Versions and compatibility
| Latest version | Regular: v1.0.5. Director's Cut: v1.0.4 |
| Released on | Regular: 14-sep-2022. DC: 28-sep-2022 |
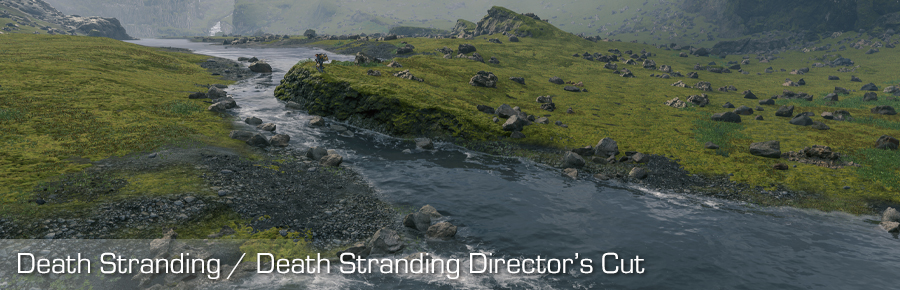
| Compatible with | Death Stranding / Death Stranding Director's Cut (Steam) |
| Hotsampling via | Running the game in windowed mode. |
| Supports IGCS Connector | Yes (Directors Cut) |
| Supports IGCSDOF | Yes |
| Download latest version | Post on patreon |
Features at a glance
The photomode mod for Death Stranding / Death Stranding Director's Cut offers the following features:
-
Camera control: (Also in cut scenes and photomode)
- FoV control
- Free unlimited camera movement and rotation
- Timestop / game pause control
- Camera paths support ('dolly cam') for defining moving camera trajectories for movies.
- Game speed control (slow-motion, speed up)
- Frameskip
- HUD toggle
- Hotsampling (resize the game window to any resolution)
- Higher terrain LODs
- Configurable keybindings
- Configurable gamepad buttonbindings
How to use
Please see for details how to get started and configure this photomode mod, General features and configuration. This guide will provide additional information for the controls / features specific for this photomode mod.
If you don't see the ds.exe process in the Process to inject to textbox, please click the Select button to select it manually. This might be
the case if you're running the game as Administrator,
and the IGCSClient.exe does not, it can't see the ds.exe process. In that case, restart the IGCSClient.exe as Administrator.
Please use the Death Stranding tools for the normal Death Stranding game and the Death Stranding Director's Cut tools for the Death Stranding Director's Cut version. I know, who would think of that!
Image Adjustments
The Image Adjustments tab is the tab where you can adjust some aspects that might influence the image.
Miscellaneous options
- Game speed
- This controls how fast the engine runs internally; a value of 1.0 is 'normal game speed' and a value of 0.0 is total pause. Use this to create slow-motion effects which help you pause the game at the right moment.
- Higher Terrain Details
- This setting will allow you to select higher level of detail elements for terrain (rocks mostly).
Hotsampling
To take screenshots at higher resolutions than your regular gaming resolution, run the game in windowed mode. To get rid of the window border, on the Hotsampling tab, click 'Fake fullscreen'. To switch to a high resolution, select the resolution and aspect ratio you want from the tree on the Hotsampling tab and click 'Set'. You can also select one from the list of previous used resolutions if you switch between a given set of resolutions frequently. If the resolution fits your monitor, the game will add a border, you have to click 'Set' again to get rid of it.
The IGCS client will resize the game window to the requested resolution and the game will resize the game framebuffer accordingly, allowing you to take a shot at a high resolution. To go back to your regular gaming resolution, simply click the 'Fake fullscreen' button again.
You have to click the set button twice. This is because the game tries with all its might to reduce your fun with it, so it wants to keep the window bar and clamps the window size to your monitor's size. If you click the Set button the second time, the window will be properly resized and the window bar will be removed.
Also be aware that hotsampling is something the game doesn't officially supports so it might crash, especially if you cranked up the LOD slider.
Frame skip and game pause/unpause
The pause / unpause function of this game doesn't really lent itself for frame skipping: when you skip frames several times during a cutscene, it might be the system syncs up the camera with a key frame. It also might be it looks like the game hangs when you unpause or that you have to press Numpad 0 multiple times.
This is something that the game does too when you press ESC / F8 (photomode) several times and unpause the game: it will then sync up the cutscene with the current camera position. Additionally, you can unpause the game in the photomode, but it will require pressing Numpad 0 twice. The same problem happens after you've then leave the photomode and press Numpad 0 again, it says 'game paused' but the game isn't pausing. Pressing Numpad 0 again will pause the game.
So rule of thumb: use frameskipping as less as possible. When possible, try to use the photomode (F8) also in cutscenes to pause the game. You can then press Insert to enable the camera and move it to whereever you want.
About Anisotropic Filtering
It's wise to enforce anisotropic filtering x16 at the Nvidia configuration panel, as by default the game uses x4.
Information recorded with camera path nodes
When you create a Camera path, each node records the camera location, orientation and field of view.
Controls
The default photomode mod controls are listed below. It depends on the Camera control device setting on the Configuration tab whether the device (e.g. mouse or gamepad) can control the camera.
Mouse
When moving the mouse:
- No mouse buttons pressed: rotate the camera
- Left button pressed: move camera up / down / left / right
- Right button pressed: move camera forward / backward / left / right
- Both left and right button pressed: tilt camera left / right
- Mousewheel: increase / decrease Field of View (FoV)
Keyboard
Normal camera usage
| Key | Feature |
|---|---|
Insert |
Enable / Disable the camera |
Numpad . |
Block / Unblock input to game |
Numpad - |
Decrease FoV |
Numpad + |
Increase FoV |
Numpad * |
Reset FoV |
Home |
Lock / Unlock camera movement |
Numpad 4 |
Move camera left (+ Ctrl: slower, + Alt: faster) |
Numpad 6 |
Move camera right (+ Ctrl: slower, + Alt: faster) |
Numpad 8 |
Move camera forward (+ Ctrl: slower, + Alt: faster) |
Numpad 5 |
Move camera backward (+ Ctrl: slower, + Alt: faster) |
Numpad 7 |
Move camera up (+ Ctrl: slower, + Alt: faster) |
Numpad 9 |
Move camera down (+ Ctrl: slower, + Alt: faster) |
Numpad 4 |
Move camera left (+ Ctrl: slower, + Alt: faster) |
Arrow key Up |
Rotate camera up (+ Ctrl: slower, + Alt: faster) |
Arrow key Down |
Rotate camera down (+ Ctrl: slower, + Alt: faster) |
Arrow key Left |
Rotate camera left (+ Ctrl: slower, + Alt: faster) |
Arrow key Right |
Rotate camera right (+ Ctrl: slower, + Alt: faster) |
Numpad 0 |
Pause / Unpause the game |
Page down |
Skip a few frames when paused |
Numpad 1 |
Tilt camera left (+ Ctrl: slower, + Alt: tilt 90 degrees left) |
Numpad 3 |
Tilt camera right (+ Ctrl: slower, + Alt: tilt 90 degrees right) |
Numpad 2 |
Reset tilt |
Del |
Toggle HUD |
Camera path usage
| Key | Feature |
|---|---|
F7 |
Start / pause playback |
F8 |
Stop playback |
F4 |
Add path |
F10 |
Add node to active path |
Ctrl+F10 |
Replace the active node on the active path |
Alt+F10 |
Insert a new node in front of the active node on the active path |
Ctrl+Home |
Go to start of active path |
Ctrl+End |
Go to end of active path |
Ctrl+Page Up |
Go to previous node on active path |
Ctrl+Page Down |
Go to next node on active path |
Numpad 1 |
Select the first path during playback (if any) |
Numpad 2 |
Select the second path during playback (if any) |
Numpad 3 |
Select the third path during playback (if any) |
Numpad 4 |
Select the forth path during playback (if any) |
Numpad 5 |
Select the firth path during playback (if any) |
Numpad 6 |
Select the sixth path during playback (if any) |
Numpad 7 |
Select the seventh path during playback (if any) |
Numpad 8 |
Select the eighth path during playback (if any) |
Numpad 9 |
Select the ninth path during playback (if any) |
Gamepad
Normal camera usage
| Control | Feature |
|---|---|
| Left stick | Move camera forward / backward / left / right |
| Right stick | Rotate camera |
| Left trigger | Move camera up |
| Right trigger | Move camera down |
| Y button + left / right stick | Faster movement / rotation |
| X button + left / right stick | Slower movement / rotation |
| D-pad up / down | Decrease (zoom in) / Increase (zoom out) FoV |
| B button | Reset FoV |
Camera path usage
| Control | Feature |
|---|---|
| Start | Start / pause playback |
| Back | Stop playback |
| Left bumber | Go to previous node on active path |
| Right bumper | Go to next node on active path |
| A | Add node to active path |