Versions and compatibility
| Latest version | v5.8.20 |
| Released on | 26-jul-2026 |
| Compatible with | Games using Unreal Engine v5.1 and later. |
| Hotsampling via | Running the game in windowed mode |
| Supports IGCS Connector | Yes, v2.0+ |
| Supports IGCSDOF | Yes |
| Download latest version | Post on patreon |
Universal Unreal Engine 4 Unlocker (which uses version numbering v4.x, described elsewhere on this site) is for games using Unreal Engine v4.11 or higher. Universal Unreal Engine 5 Unlocker (which uses version numbering v5.x, described on this page) is for games using Unreal Engine v5.1 or higher.
The Universal Unreal Engine 5 Unlocker is in its early stages as there are only a few games out there released with Unreal Engine v5.1. I try to make it compatible with as much games as possible but it's not possible for me to update it for every tiny indie game out there which is released as a demo version. If you tested UUU v5 with a game and it works, please let me know so I can put it on the list below. I'll do as I did with v4, which is slowly gather enough matching patterns so it matches with the majority of games out there. But as it's early days with Unreal Engine v5, it is a work in progress.
Oh and before you ask, no, it doesn't work with Fortnite, nor will it work with Fortnite in the future: my tools won't work with online games.
Features at a glance
The Universal Unreal Engine 5 Unlocker (in short: UUU) offers the following features:
-
Full, unlimited camera control (gameplay, cutscenes)
- Controller or mouse/keyboard control over the camera
- Field of view (FoV) control
- Tilt
- Camera shake controls in both manual movement (for hand-shot videos) and camera paths.
- Camera paths support ('dolly cam') for defining moving camera trajectories for movies.
- Infinite custom spotlight and pointlights
- Multiple timestops (slomo 0 based, and UWorld::IsPaused based)
- Frameskip
- Engine Console for specifying tweaks and UE5 commands
- HUD toggle (AHud and UWG/Slate widget based)
- Hotsampling (resize the game window to any resolution)
- Post-processing effect control
- Ability to dim existing scene lights
- Ability to toggle visibility of your game character
- Ability to reposition / rotate your game character
- Pillarbox/letterbox removal in custom aspect ratios
- Game speed control (slow-motion, speed up)
- Invulnerability for your character
- Ability to control the animation speed of NPCs/characters in the game, including pausing
- Ability to pose skeletal mesh actors
- Ability to apply expressions on metahuman based actors
- Ability to control atmospherics like Exponential Height fog, directional light, Sky Atmosphere and Volumetric Cloud.
- Ability to select, move, rotate, scale, hide and clone any actor (static mesh or skeletal mesh actor)
- Ability to dump the UE5 object store contents in detailed format to a text file
- Ability to dump all cvars/console commands with current values and help text to a text file or json file
- Unlocks readonly cvars and console commands
- Unlocks readonly cvars and console commands
- Ability to use the 'SET' command in the console
- Configurable input interpolation for smooth camera movement/rotation/fov zoom in/out
- Per game configuration persistence, so you can use different settings for each game.
- Three slots to save camera state (location/orientation/fov) for quickly switch between them
- Configurable keybindings
- Configurable gamepad buttonbindings
How to use
Please see for details how to get started and configure the UUU, General features and configuration. This guide will provide additional information for the controls / features specific for the UUU.
If you click Select and the game process isn't shown, even though you know it's running, it's likely the game runs as administator and you therefore have to run the UuuClient.exe also as administrator: right-click the UuuClient.exe and select 'Run as Administrator' or create a shortcut to the exe on your desktop, right-click it, select Properties and on the Shortcut tab, select Advanced..., then check the 'Run as Administrator' checkbox and click OK.
After injecting the DLL
After you've successfully injected the dll, you'll get a series of notification windows in the top left corner of your game window which some info regarding what the UUU is doing. You can now switch to the Available features tab to see which features of the UUU are available with the game you're using it with.
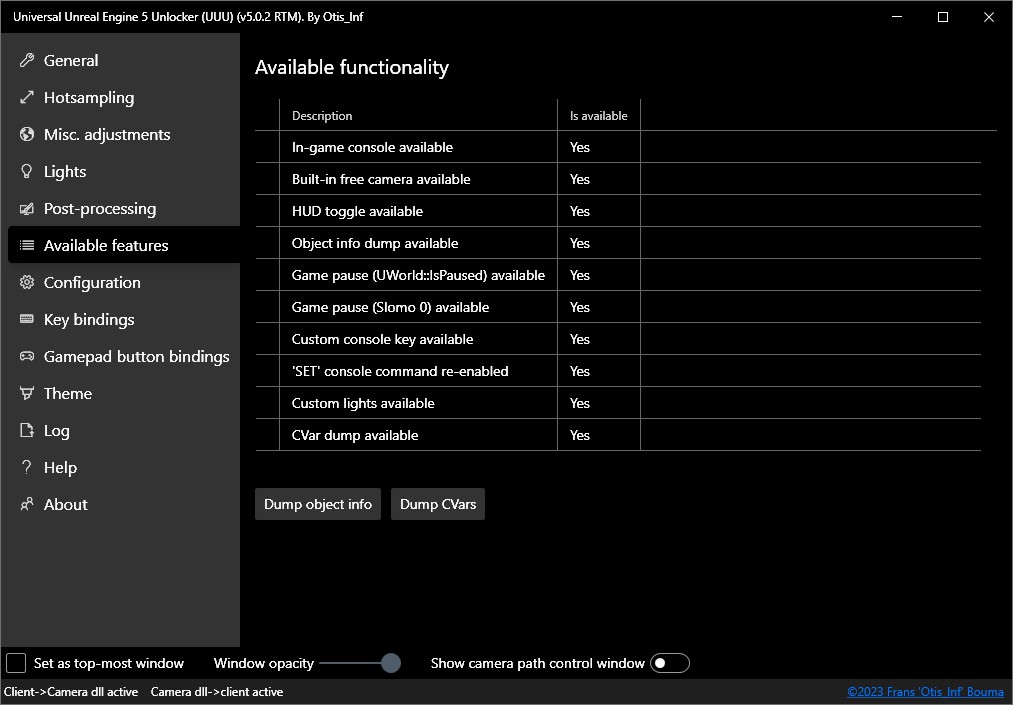
Here, with the Lyra example game, all features are available.
The Dump object info button can be used to dump all active object names, their structure, functions, properties and the addresses in memory to a text file on disk. This feature is helpful for people who want to use cheat engine with the game at hand. See for more info the object dumping section below.
The Dump CVars button can be used to to dump all available cvars (console variables) and console commands, with their names, current value (in the case of cvars) and the help text associated with them, to a text file. This can help with tweaking games using the console. See for more info the cvar dumping section below.
Configuration
Besides the General features and configuration options, the UUU offers additional configuration options on the Configuration tab.
Game behavior options
Key selection for opening the in-game console
It might be the ~ key doesn't do anything, even though the console was created successfully by the dll. This might be caused because the game unbound the ~ key and therefore it's not possible to open the console. Additionally, you might be using a non-US keyboard, like an Azerty keyboard, and on those keyboards, the ~ key isn't above the TAB key and the engine won't recognize it.
To correct this, on the Configuration tab, the setting Key to open in-game console allows you to select from a small set of keys what to use to open the console. By default this is 'Tilde' (~). Please select a key that's on your keyboard and which doesn't need Shift to be selected. E.g. on a French (Azerty) keyboard, the '$' key is a good choice, so choose in the drop down Dollar ($) as console key.
Block focus loss method
It might be the game shows the menu when you alt-tab to another window. To prevent this, the UUU has two methods to block the notification to the game window that you've alt-tabbed away, and they're named Method A and Method B. In general, if your game doesn't show the menu when you alt-tab away to another window, leave this option to None. Method A uses a simple block mechanism inside the engine and keeps telling the game that it has the focus. It depends on the game if this works or not, but if it does, it likely doesn't lead to any glitches so first try this method.
Method B is a method that fairly often works, but also could lead to glitches in some games. If your game shows the menu when alt-tabbing away, and Method A doesn't fix it, try to use Method B.
These methods take effect as soon as you alt-tab back into the game and remove the menu manually by e.g. pressing ESC. Alt-tabbing away after that shouldn't show the menu.
Slomo pause type
By default the UUU selects the MatineeTimeDilation value in the engine for pause. This works for the majority of games. However sometimes this value doesn't work or gives odd results and instead it should choose the TimeDilation value to pause the game. This option allows you to change this manually: choose TimeDilation if the game doesn't work or behaves wrongly when pressing the PageDown key to pause the game.
Use engine default for slomo min. value
By default the UUU pauses the engine with a (matinee) time dilation of 0.0. However some games crash with that value. In that case, please check this checkbox to make the UUU use the engine's default minimum value which is usually 0.0001. The UUU doesn't use this as the default because in some games a value of 0.0001 causes cloth/hair physics to go bezerk. And we can't have bezerk hair/clothing, it's not the 1990-ies anymore!
Use Engine pause for UWorld::IsPaused
By default the UUU uses a low-level pause for UWorld::IsPaused (by default activated using Numpad 0). If you want to use the default engine pause function instead, check this checkbox. Checking this checkbox might cause the game to bring up the pause menu however. If the UWorld::IsPause function isn't found, the UUU will always use the default engine pause instead.
Aspect ratio axis constraint method
When the aspect ratio changes (e.g. you resize the window or the UUU removes the letter/pillar boxing constraints), the engine will either extend the image in the horizontal direction or vertical direction or keep the same image and zoom in. You can control what happens with this setting.
By default Unreal Engine v5.2 or earlier uses Maintain X (horizontal) FOV, so the game zooms in when the aspect ratio becomes wider and zooms out when the aspect ratio becomes narrower. Unreal Engine v5.3 changes this to Maintain Y (vertical) FOV. This might not be a good fit for your monitor setup with a particular game. With this setting you can override what the game is doing and control it yourself.
Saving the current configuration as the default settings
On the Configuration tab you'll find the Save configuration as default button. This button will save the current configuration (settings, key bindings, gamepad bindings, theme) as the default for the UUU, so it'll use these settings next time you use the UUU with a game you haven't used the UUU with before. It's not going to overwrite the settings for games you already have used with the UUU, as these have their own settings already set.
Opening the in-game console
In-game, press the ~ key (it's the key above the TAB key on your keyboard), or the key you configured if you're on a non-US keyboard.
This should give a small line at the bottom of the game screen in which you can type commands.
If you type the ~ again you'll get a larger console window which also shows the response of the game on your commands.
There are many commands to choose from. Not all of them work. E.g. god or fly might say they're activated but chances are they're not doing anything. Commands like fov 50 (to set the FoV to 50 degrees, default is likely 80), pause (to toggle the pause of the game) and a lot of console variables do work. In Unreal Engine 5 the cheat manager object isn't instantiated like it was in Unreal Engine 4, so commands like toggledebugcamera aren't working at this moment.
For more information about tweaking UE5 games, please see the Tweaking Unreal Engine 4 Games guide on the Framed Screenshotting Community site for more info about what commands you could use to make the game look even better. For an interactive list of all Unreal Engine 5.1 commands and variables, please check the UE5 command page on the framed site
What to do when the console doesn't open
It might be the ~ key doesn't do anything, even though the console was created successfully by the dll. This might be caused because the game unbound the ~ key and therefore it's not possible to open the console. Additionally, you might be using a non-US keyboard, like an Azerty keyboard, and on those keyboards, the ~ key isn't above the TAB key and the engine won't recognize it.
To correct this by choosing a different key to open the console, please see the Configuration section above.
Setting the console key in the game's ini files
Alternatively, you can add a custom console key to the game's ini file. This doesn't always work, but it's worth a try if you want to use another key than is available in the menu. Follow these steps
- In explorer go to:
c:\users\<your username>\AppData\Local\<game name>\Saved\Config\WindowsNoEditor - open Input.ini
- Add (pay attention to the empty line, that has to be there):
[/Script/Engine.InputSettings]
ConsoleKey=Tilde
- Save and set the file to readonly. You can also set it to another key, e.g. K.
Console tricks
The Unreal Engine console supports copy / paste of text. This is a great help if you want to execute multiple commands and have to type them in every time.
Additionally, it supports multiple commands on the same line, where you separate the commands with the | character. Combined with copy/paste you can
create long strings of commands in a text file and copy/paste them over to execute all the commands in one go.
Examples:
showhud 0|fov 60|pause|r.postprocessaaquality 2
This hides the hud, sets fov to 60, pauses the game, and sets the AA to a lower quality so you don't have jitter blur.
The console also remembers a history of commands, and keeps the line with multiple concatenated commands as one line. To show the history, press the arrow-up key in the console.
Misc. adjustments
The UUU offers some extra features for your game:
- Game speed
- Enabling this setting will allow you to control the game speed. This is similar to specifying
slomowith a value on the in-game console, e.g.slomo 0.2will run the game at 20% of the full speed. It is only available if the Slomo pause is available (see Available features). A value of 1.0 is 'normal game speed' and a value of 0.0 is total pause. - Npc animation speed
- Enabling this setting will allow you to control the animation speed of NPCs / other characters in the game. A low value will make them go very slowly, a high
value will make them go very fast. To pause the NPCs, press the NPC pause key, by default that's
END. Please see the note below about caveats. - Player size
- Enabling this setting will allow you to shrink or enlarge your player's character in-game. Setting the slider all the way to the left (the minimum value) will make your character
(almost) disappear. Use this to hide your character. To make the setting take effect, the game has to receive input to move the character. If you have paused the game already,
press e.g.
Wor the left stick forward and after it the key for frameskip (defaultPageUp). - Existing game light intensity percentage
- Enabling this setting allows you to dim existing scene lights to the percentage you've specified. So if you set the slider to 10%, it'll dim all scene lights to 10% of their original intensity. It might take a short period of time before the UUU has collected all lights in a scene so be patient. Some games bug with this feature and show only darkness immediately after enabling the toggle. The main purpose of this feature is to be able to add your own custom lighting to a scene using the Lights feature of the UUU.
- Toggle player visibility:
- This toggles the player's 'actor' pawn's visibility, as well as the visibility of directly attached 'actors' like weapons. It might be effects and other elements might not hide, but it depends on the game. The player isn't hidden for enemies, the visible representation (e.g. your character) isn't rendered
- Gameplay / Cutscene FoV
- If enabled, this setting will enforce the FoV to be a percentage of the in-game FoV. Use this slider to decrease or increase the FoV during gameplay and cutscenes. A value of 1.0 means, use the current in-game FoV value. A value of 0.5 means use 50% of the in-game FoV as the FoV. A value of 1.2 means use 120% of the in-game FoV as the FoV. This way you're not stuck with a fixed fov if the game changes the FoV, e.g. due to gameplay actions or in cut-scenes.
- Make player invulnerable
- This setting might not work in all games. It disables the flag that your character can receive damage, but some games have implemented this differently and in these games it has no effect. You can use this to create better action shots.
Npc animation speed might crash your game or cause enemies to disappear. It's key to first use the Npc animation speed before pausing Npc's as it might be the game you're using the UUU with can't deal with an animation speed of 0. It also might be the feature doesn't affect certain characters in your game. This is likely because these characters aren't deriving from the Unreal Engine's Pawn class.
If you pause NPCs and new NPCs are spawned, these aren't paused. This is because the UUU first grabs all existing NPCs and then pauses these. New NPCs spawned after that won't be affected.
Post processing
The post-processing tab offers a way to control a variety of post-processing effects of the engine. It depends on the game's engine version (the higher, the better), and if the game uses a given feature to make a setting have any effect.
As there are over 96 settings available, it's too much to document them all, so please look at the Unreal Engine documentation for post processing:
- See https://docs.unrealengine.com/5.2/en-US/post-process-effects-in-unreal-engine/ for post-processing overview
- See https://docs.unrealengine.com/5.2/en-US/API/Runtime/Engine/Engine/FPostProcessSettings/ for details per setting.
You'll notice there are even more settings available in the engine. I've implemented support for the ones that made sense in a real-time game environment (hence why there are no path tracing settings).
All settings are grouped together. To show a group, click on the group header. To control the settings you can enable them and then change the values or
set multiple settings in one go by using presets. The UUU ships with a couple of presets to get you started. You can create new
presets by enabling one or more settings and clicking the Save as preset... button. This will ask for a name for the preset and if the name is valid
it'll save the settings under that name in the file name specified.preset, in the folder PostProcessPresets in the UUU folder.
You can activate more than one preset at a time, so you can create small presets and this gives you fine control over what you want to do.
Editing post-processing values gives a lot of power over how the game looks. To get back to the original state, click on Reset all, to reset all settings to the default values and switch them off. Clicking Toggle all off will switch all settings off, but won't reset them to their default values.
The 'default value' for a setting is the default value Unreal Engine defines for the setting. It might not be the active value that's used by the game.
Multiple game pause/timestops
The UUU has two ways to pause the game: using the normal UWorld::IsPaused hack, (Numpad 0), and one using the slomo command code, (Page down).
You can use either one, if they're both available/found. Numpad 0 is a hard-pause which could lead to TAA jitter in the scene.
You can remove that by stepping down the AA a bit, using the following command on the in-game console: r.postprocessaaquality 2 in the console.
To set it back, use r.postprocessaaquality 6. The downside of that is that cutscenes might play on and the lower quality AA might remove some effects.
The slomo based pause using Page Down doesn't suffer from TAA jitter, and can pause most, if not all, cutscenes as well (except audio in some
situations). In general, if the latter is supported, you should use the slomo based pause.
If both don't work, you can try pause on the in-game console. pause isn't an official command but a lot of games support it in one way or the other.
Lights
The UUU offers the ability to create an infinite number of custom lights in a UE5 game. If the feature is available in the game, you can use the Lights tab to create new SpotLights and PointLights and edit their characteristics. A SpotLight is a light which shines a cone of light in one direction and a PointLight is a light that shines light in all directions.
You can create and edit lights in both the client and the in-game overlay. This section is about the client's light features. For the overlay lights section please see further down this documentation.
The client's Lights section doesn't offer attaching a light to an actor or light grouping, nor editing relative angle/height/distance when the light is attached an actor. The main reason for this is because there's no actor information on the client. This means that when a light is attached to an actor, it's best to edit it in the overlay's Lights tab (you'd have that open anyway to attach a light an actor). You can still edit a light's properties like shadow settings or intensity on the client if the light is attached to an actor.
The Lights Tab
The screenshot below shows an example where two SpotLights have been created
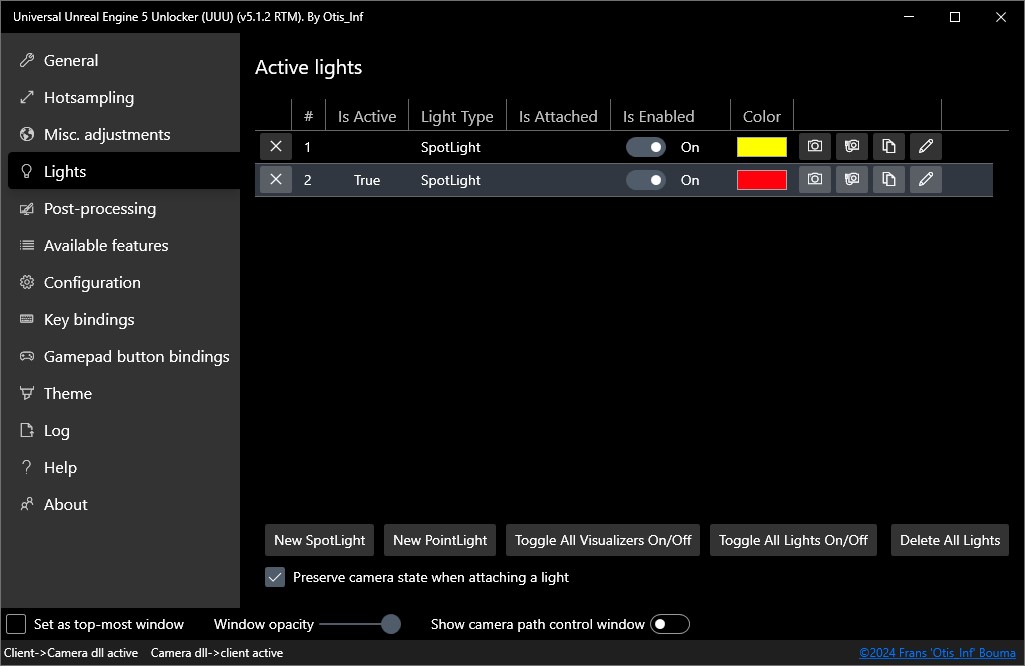
The grid shows the following columns:
- Is Active
- This column shows which light is the 'active' light for keyboard shortcuts. The light which has 'True' in this column is affected when you press one of the keyboard shortcuts that work on an existing light, like attach to camera.
- Light Type
- The type of the light, be it SpotLight or PointLight
- Is Attached
- Each light which is attached to the camera has a toggle button shown in this column. You can use this toggle button to detach the light from the camera. When doing so and you left the option Preserve camera state when attaching a light checked, then the camera will move to its original position (unless the free camera isn't active).
- Is Enabled
- This column contains a toggle for each light to switch it off and on
- Color
- This column offers a color editor for quickly changing a light's color without going into the light editor.
Additional to these columns, the last column contains four buttons per light:

- This button will move the camera to the light and attach the light to the camera. This will mark the light as 'active'.
- This button will move the light to the camera and attach the light to the camera. This will mark the light as 'active'.
- This button will create a copy of the light at the position of the camera.
- This button opens the light in the Light Editor and marks it as 'active'.
The buttons that attach a light to the camera will preserve the original camera position, if the option Preserve camera state when attaching a light is checked. The camera will return to that position when you detach the light from the camera. Attaching a light to the camera gives fine-grained control how to position the light.
When you have a light attached to your camera and you move it around, it might be the engine will stop updating the light in the 3D world. To fix this, switch the light off and on again (yes, really) and the engine will restart rendering it. Use the toggle under Is Enabled for that.
At the bottom of the Lights tab the following options are available:
- New SpotLight
- Clicking this button will create a new SpotLight at the location and rotation of the camera using the default values.
- New PointLight
- Clicking this button will create a new PointLight at the location and rotation of the camera using the default values.
- Toggle All Visualizers On/Off
- This button will toggle the visualizers for each light on or off. If the button isn't enabled, your game doesn't support light visualizers. Light visualizers are off by default.
- Toggle All Lights On/Off
- This button will toggle all lights you've created on or off.
- Delete All Lights
- This button will delete all lights you've created. It'll ask for a confirmation first.
- Preserve camera state when attaching a light
- Checking this checkbox will perserve the camera position and rotation when you attach a light to the camera. It's then moved back to its original position when you detach a light.
When you're done with a scene and thus your lights are no longer of value, it's highly recommended to delete them. It might be the existing lights will keep the game from loading another level or might even crash.
When you create a new light and it doesn't seem to affect some elements in the world, e.g. your character is unaffected by it, please check the light channels
The Light Editor
When you click the Edit Light button of a light in the Lights tab, it is opened in the Light Editor. The Light Editor looks like the following screenshot:
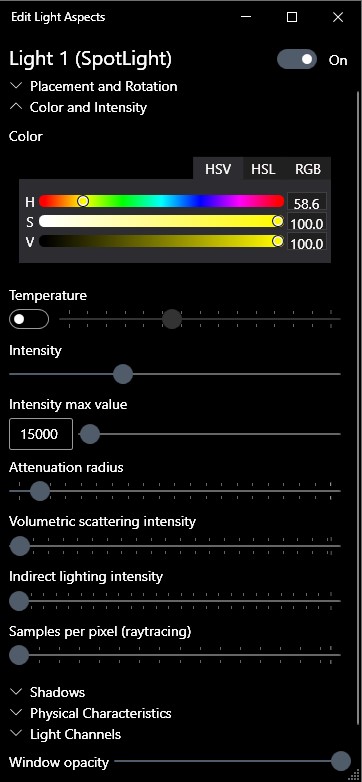
The Light Editor has many controls, which you can view by expanding the various parts, like Placement and Rotation, Shadows etc. The Light Editor remembers what you have expanded so next time you open a light in the Light Editor, you don't have to expand all groups again.
The Light Editor offers several numeric textboxes like the x/y/z coordinates. To change these, click inside these textboxes and use your mousewheel to change these values quickly. Hold Shift while using the mousewheel to change the value with bigger steps, hold Control while using the mousewheel to change the value with small steps.
The coordinates / angles aren't shown if the light is attached to an actor.
The Light Editor offers the following functionality:
Placement and Rotation
Placement
X and Y are horizontal, so changing X and / or Y will move the light in a horizontally direction. The X and Y coordinate are relative to the world, not to the camera. Z is up, so making Z smaller will move the light down, making the value bigger will move the light up.
- X
- This is the x coordinate of the location of the light.
- Y
- This is the y coordinate of the location of the light.
- Z
- This is the z coordinate of the location of the light. (Up)
Rotation (Spotlights only)
The angles are in degrees, so 0 and 360 are the same position. If you move the slider of an angle to either the start or the end, you should continue on the other end of the slider. So moving the slider to 0 (the left edge, or start of the slider) makes you can't go any further as the slider stops at the left edge. To rotate the light further in the world, you should move the slider all the way to the right (360 degrees) and then slide the slider to the left.
- Pitch
- This is the angle to rotate the light up or down. 0 is straight down, 180 is straight up.
- Yaw
- This is the angle to rotate the light left or right.
- Roll
- This is the angle to rotate the light along itself. This angle is usually 0, and only used if you use the source radius settings (further below), so you can rotate the reflection.
Color and Intensity
- Color
- This color editor allows you to edit the color of the light using HSV, HSL or RGB editors, whatever you prefer. See the Wikipedia article about what HSL and HSV means.
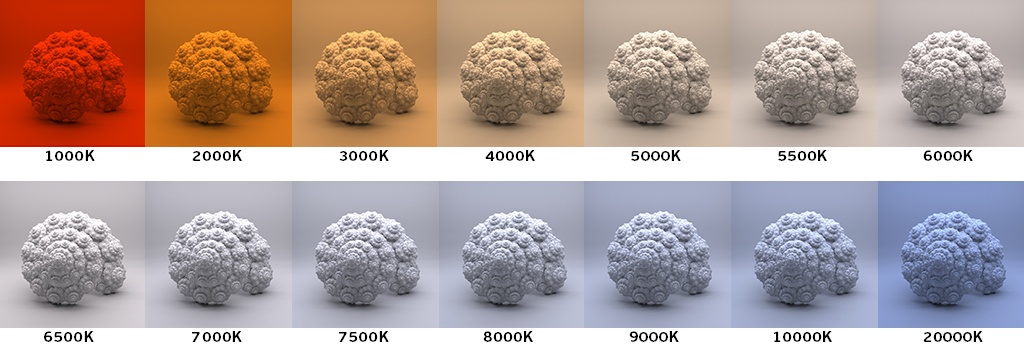
- Temperature
- When enabled allows you to specify the temperature of the light, from 1000 Kelvin to 15000 Kelvin. This is additionally to the light color and can change how a light's color will look. See the chart below what temperature does to a white light. It's recommended to first use the temperature slider to set your light's color, unless you're going for a light color that's not achievable with the temperature slider. The main reason for this is that temperature changes won't affect the luminosity of the light, while color changes do.
- Intensity
- The brightness of the light. The maximum value of this slider is controlled by the Intensity max value slider.
- Intensity max value
- The maximum value of the Intensity slider. To be able to have fine-grained control over the Intensity value, the maximum is configurable.
- Attenuation radius
- This slider controls how far in the world the light will affect geometry and models. The higher the value the more will be lit by the light.
- Volumetric scattering intensity
- This is the amount the light affects the fog that's in the world. It might be this option doesn't do anything, because there's no fog volume in the game at the light's location.
- Indirect lighting intensity
- This scales the indirect lighting contribution from the light to the environment.
- Samples per pixel (raytracing)
- This sets the number of samples to use per pixel for Ray Traced Shadows from Point and Spot Lights. Additional samples decrease performance while increasing quality and accuracy.
Shadows
- Cast shadows
- This checkbox toggles shadow rendering of the light. Off means no shadows at all.
- Cast deep shadows
- This checkbox toggles deep shadow rendering, which is used on some hair rendering techniques in UE5. Only works when the game uses the hair rendering system of UE5.
- Cast raytraced shadows
- This checkbox toggles whether the shadows cast by the light are done by raytracing. This requires the game to have raytracing enabled.
- Cast volumetric shadows
- This checkbox toggles whether the light will cast volumetric shadows in fog volumes when the Volumetric scattering intensity is set to a value that makes the light show a light beam.
- Shadow bias
- This controls one of the two shadow bias values. In general: if the light is close to the object that's shadowed, setting this to a lower value gives sharper shadows and no banding. See the Unreal Engine documentation for more details
- Shadow slope bias
- This controls one of the two shadow bias values. See the Unreal Engine documentation for more details
- Shadow Resolution Scale
- Scales the resolution of shadowmaps used to shadow this light. By default shadowmap resolution is chosen based on screen size of the caster.
Constrained by the value set to
r.Shadows.MaxResolution. Only effective if the game has been compiled with Raytracing Support Off. - Contact Shadow Length
- Length of screen space ray trace for sharp contact shadows. Zero is disabled. See the Unreal Engine documentation for more details
Physical Characteristics
SpotLight specific
- Inner cone angle
- Sets the inner cone angle of the SpotLight, in degrees.
- Outer cone angle
- Sets the outer cone angle of the SpotLight, in degrees. Setting this value the same as the Inner cone angle gives a hard edge on the light's circle.
Settings for all light types
- Source radius:
- The radius of the light source shape. Mostly used for the reflection of the light itself
- Soft source radius
- The radius of the soft edge of the light source shape. Mostly used for the reflection of the light itself
- Source length
- The length of the light source shape. Mostly used for the reflection of the light itself
- Specular scale
- The scale of reflection of the light source shape. Setting this to 0 will mean the light isn't reflected at all.
- Affect dynamic indirect lighting
- Whether the light is added to the dynamic indirect light already in the scene
- Affect transluent lighting
- Whether the light is added to the light through transluent/ transparent objects.
- Affect global illumination
- Whether the light affects global illumination. Only in effect if the game uses a dynamic GI system.
- Affect reflection
- Whether the light is added to the reflections in surfaces. This isn't the light bulb itself, but the lit elements lit by the light.
- Transmit through sub-surface scattered surfaces
- Whether the light should transmit through sub-surface scattered surfaces such as skin or leafs on trees and plants.
Light channels
Light channels are a way for UE to control which lights affect which objects in the world. A light that has only its Light channel 0 checkbox checked, won't affect any object in the world that's set to light channel 1 or 2. By default a light is placed in the light channel 0 (unless the game puts all lights in specific channels). E.g. if your light doesn't affect your character (e.g. in Darksiders III, the player's character is on Light channel 1), check the checkboxes of the other light channels to have the light affect the character.
Light visualizers
See for light visualizers the section in the in-game overlay part of this documentation.
Further reading
Lighting is a complex topic and it can help to read a bit more about how lights work in UE5. The lights created by the UUU are movable lights and the documentation about movable lights in UE5 applies to these lights.
- The lighting documentation of UE5
- UE4 Lighting Types video by Ryan Manning which applies to v5 as well.
Player pawn movement
The UUU offers the ability to move your player pawn, the in-game character when the camera is active. This can be particularly handy when you have paused the game but your character is not really in the right spot. This feature is only available when the camera is active so you can't use this to 'teleport' to another location on the map.
Player pawn movement and rotation has been implemented for mouse and gamepad. If you have the camera device set to gamepad, you can use the gamepad for moving/rotating the player pawn. If you have set the camera device to 'keyboard/mouse', you can use the mouse to move / rotate the player pawn. If you have set the camera device set to 'both' you can both use the mouse or gamepad to move / rotate the player pawn.
Caveats
- It might be your player pawn moves but some part is stuck on the old location. This isn't solveable. After moving / rotating, press the Skip Frame button to quickly unpause/pause again.
- Some games don't let you rotate the player pawn when it's doing an animation. This isn't something the UUU can fix.
- Moving the player pawn when the game isn't paused will continue to apply physics on the character, so trying to move the character up or down likely won't work. Instead pause the game and then try to move the character up/down.
Gamepad
To enable move / rotate mode for gamepad, press the A button (or X on a Playstation controller) together with rotation left/right stick and/or using the triggers. Releasing the A button will make the gamepad move the camera again.
So e.g. to move your player pawn a bit to the left, hold A plus push the left stick to the left. To get fine-grained control over movement also press X (or [] on a Playstation controller) to slow the movement. To move the player pawn up or down use the left or right trigger. For rotations, instead of using the left stick, you use the right stick.
Mouse
To enable move / rotate mode for mouse, press the Shift key on your keyboard together with moving your mouse and pressing no button or the left mouse button or the right mouse. Releasing the Shift key will make the mouse control the camera. The movement is the same as when controlling the camera with only the mouse. Holding Ctrl will give you fine grained control over the movement and rotation.
So like the example with Gamepad above, to move your player pawn a bit to the left, hold Shift while holding the left or right mouse button and move the mouse to the left.
The in-game overlay
Starting with the UUU v5.2.0, the UUU now offers an in-game overlay which can be opened by pressing Ctrl-Insert. If you have bound another key to camera enable, you have to press Ctrl and that key.
The in-game overlay offers a limited set of the same features available through the keyboard as well as a way to manipulate elements in the game world.
While I've spent considerable time to test this feature and iron out all the different quirks for various games, it's not unlikely you will run into crashes when e.g. changing the skeletal mesh of a character or change the animation. These crashes are likely related to game code and there's no fix.
Additionally, various versions of Unreal Engine introduced different features and fixes for long standing bugs so for e.g. older games, playing an animation on an in-game character will make it T-pose when you disable the camera. The overlay will mention this and will only allow custom animations on a clone of the character. This is easy to do by clicking the 'Clone and hide original' button. I've run into some games where cloning the main character however caused crashes so for some games you sadly will run into problems either way.
Unreal Engine uses a strict garbage collection system in memory which means if something isn't used anymore, it'll be 'removed from memory'. This might be the case if you e.g. set your character's skeletal mesh to something else so the original skeletal mesh isn't used anymore in the game world. It might then result in a crash when you disable the camera/reset the actor, as the UUU doesn't know the original skeletal mesh has been removed and tries to set the actor to that (now removed) original skeletal mesh. So changing skeletal meshes is best done on clones.
When disabling the camera, your changes will be erased and the world state will be restored as-is. It might be some characters will T-pose or A-pose if you have changed their animations. This isn't fixable and is described in detail below.
The overlay has a resizable window with three tabs: Camera, Actor selection and manipulation and Pause / Gamespeed. You'll see ? icons on various places; please hover over these icons to get more info about a feature.
The Camera tab
The Camera tab contains basic controls over whether the camera is enabled, the FoV, roll/tilt and temporary storage of camera state (which are also available through Ctrl-F1/F2/F3). Additionally, it offers the following controls:
Gameplay Camera options
- Gameplay / Cutscene FoV
- If enabled, this setting will enforce the FoV to be a percentage of the in-game FoV. Use this slider to decrease or increase the FoV during gameplay and cutscenes. A value of 1.0 means, use the current in-game FoV value. A value of 0.5 means use 50% of the in-game FoV as the FoV. A value of 1.2 means use 120% of the in-game FoV as the FoV. This way you're not stuck with a fixed fov if the game changes the FoV, e.g. due to gameplay actions or in cut-scenes.
The Actor selection and manipulation tab
All elements in a gameworld in Unreal Engine are an 'Actor', the enemies you fight, the walls, the floor, everything. You can select them by clicking them in the world. You'll see the selected elements in the list of Selected actors. The UUU offers features for two type of actors: static mesh actors (e.g. walls, floors, trees) and skeletal mesh actors (e.g. enemies, your character). By default Unreal Engine doesn't mark static mesh actors as moveable, which means you can't rotate/move them. To make that possible, you have to check the Is movable checkbox for the particular actor.
In a cutscene it might be you can't select an actor at all or only some static geometry that's clearly behind the character you clicked on. This is due to the engine using a sequence player which spawns the actors in its own world, unreachable for the UUU. At the moment there's no way to obtain these actors to manipulate their poses or location.
Editor gizmo's
To view an editor gizmo on the selected actor, check the Show editor gizmo on selected actor checkbox. This will show a 3D editor (a 'gizmo') on the selected actor to move and rotate the actor
directly in the 3D world. If you need the gizmo to be more transparent press Ctrl-Shift-T (you can bind another key to this if you want in the keybindings in the client) to toggle
more or less transparency for the gizmo. An actor has to be marked moveable to have the gizmo show up.
Posing a character (Skeletal mesh actors)
To change the pose of your character and even resize elements of a skeletal mesh actor (e.g. your character or an enemy), you can open the pose editor for a skeletal mesh actor after you've selected it, by clicking Show pose editor. This will open the Pose editor. The pose editor is described in more detail further below.
Changing the skeletal mesh/animation (Experimental options)
This feature is marked Experimental because of the issues that can arise when changing meshes/animations during a gameplay session. This is also documented in the overlay when you click open the 'Experimental options' heading
Changing the animation on a character from the game world that's not a clone will likely result in a T-pose/A-posed character when you reset that actor or disable the camera. This is depending on the game whether it will re-run animation initialization when the animation / skeletal mesh is reset on a character. Some games will do that, others won't. So it's best to first clone the character and set the custom animation on the clone.
In Unreal Engine, a skeletal mesh actor (e.g. your character) in general has one 'Skeletal mesh component', the 'Component' mentioned in the overlay GUI. Sometimes games build their skeletal mesh actors with multiple components, e.g. the main skeletal mesh component for the body, arms, legs etc. and another for the head, sometimes another for hats, hair and the like.
The UUU overlay allows you to change the aspects of each of these components separately. This means that you can change the animation that's playing on the main component, but also the one that's playing on the face component for instance. Keep in mind that the UUU filters animations based on the skeleton associated with the component. Sometimes the different components all have the same skeleton, which means the same meshes and animations are listed with the different components. This makes it a bit more difficult to find the right animation or mesh for the current actor, however there's no fix for this.
Changing the skin/mesh for a skeletal mesh actor requires the camera to be active. Once you've enabled the camera, and selected an actor that's a skeletal mesh actor, you can change its skeletal mesh (if there are any) and animation. Be aware that game code might crash if it is confronted with two playable characters all of a sudden (e.g. you cloned your character), or that the game crashes because you play an animation that's not expected. So use this feature with care (e.g. be sure to save to avoid losing a lot of progress).
Once you've started an animation on a skeletal mesh actor, you can pause it by clicking the 'Stop animation' button. This allows you to, e.g. set the exact position within the animation to find that frame for the best screenshot.
Scaling/moving/rotating the actor
You can move and scale an actor (if it's moveable) and if the gamelogic allows it, also rotate the actor. With this, combined with cloning actors and pausing their animations at different frames, you can create custom scenes. The movement directions are relative to the camera look direction. So if you want to move something in a certain direction, you have to take in to account the direction the camera is facing.
Resetting an actor's state
When you disable the camera, the actors you've changed will be reset to their original state. You can also do that per actor by clicking the 'Reset actor state' button. This will set the actor's state back to the original state it had before you selected it, and will remove the actor from the selected actors list. If the current actor is a clone, there's a 'Delete clone' button instead.
If you don't want to have the actor state to be reset when you disable the camera, please uncheck the setting 'Reset actors when camera on camera disable'. This will make sure the changes you made will be kept when you disable the camera and will be present during gameplay.
The pose editor (Skeletal mesh actors)
The pose editor is available for Skeletal mesh actors, if the UUU has found the necessary information. To open the pose editor, please click the Show pose editor button. If the button isn't available, even tho you have selected a Skeletal mesh actor, then the UUU wasn't able to obtain the right information and the pose editor won't be available to you.
After you've clicked the Show pose editor button, you'll see a new editor with two panels glued together, the Pose editor window itself and a separate panel 'Bone Controls panel'. If you want this Bone Controls panel to be docked at the bottom of the Pose editor window or as a free floating window, you can do so by selecting the right Dock type in the Bone Controls panel. To make the panels bigger or smaller, please use the resize triangles in the lower right corner of the panels.
The Pose editor panel contains three tabs, where one is only shown when you edit a bone: 1) a tree with 'bones', which form the skeleton of the current mesh of the skeletal mesh actor (e.g. your character), 2) a list of morph targets per component in the actor. This tab might be empty if the game doesn't support morph targets on its actors, and 3) a tab which contains the bones you've recently edited. This is a convenience tab so you don't have to scroll the tree a lot when you want to go back to a bone.
The Bone Tree
The bone tree lists for each component in the actor that has a skeleton a tree of bones. This tree is hierarchical, meaning the bones attached to a given bone (e.g. lower arm to an upper arm) are displayed below it. This hierarchy is important because rotating the 'parent' bone will also rotate / move the 'child' bones attached to it. In the case of when an actor has multiple components, you might notice the same tree in several components, because the same skeleton is used for these components. The UUU will keep these bones in sync, so you don't need to change the same bone in each of the components.
When you enable pose editing, and hover over a bone, the location of that bone is shown on your character using a blue dot. This will make it easier to select the right bone for the edit you want to make.
Bone editor gizmo
Like with having a gizmo on the selected actor, you can also view and use a 3D gizmo on the selected bone. To do this, check the Show editor gizmo on selected bone checkbox at the top of the pose editor. It offers the same functionality as the gizmo on the actor, however rotating the bone using the gizmo will rotate the axis system as well, so you always see the right orientation of where x/y/z are. This can help with positioning the bone using the sliders. Of course you can also use the 3D gizmo to do that.
As with the actor gizmo, press Ctrl-Shift-T (or the key you bound to it) to toggle more or less transparency for the gizmo, in case you need to see through the gizmo
while editing.
Only one gizmo will be shown at any given time. So if you have the pose editor open and have enabled posing, the actor gizmo will be hidden. When you stop with the posing editor, the actor gizmo will be shown again.
The Morph targets list
The Morph Targets list shows all morph targets per component (if the game supports them). Morph targets are essentially a directive to the engine to move parts of the mesh of the component to a certain point, e.g. move an eyelid, or move a jaw, or cheek. These are often very useful, as they can move parts that otherwise would require multiple bones to be adjusted. The downside is that all you can specify is the amount of how much the morph target is in effect: 0 being not in effect (the default) and 1.0 mean fully in effect (or -1.0 to be fully negative, basically moving the part in the other direction).
Morph targets sometimes don't do much, and are more used to correct changes made by bone adjustments; bones and morph targets both in the end change parts of the mesh of the component and can thus have the same effect (or one correcting the other).
This means that what you want to do is sometimes a matter of changing a couple of bones or change a couple of morph targets or both. Saving a pose will save both so together they form the pose you work on.
The MetaHuman Expressions list
MetaHuman expressions are only supported on actors which have the MetaHuman skeleton for their face. MetaHumans are a new system of Unreal Engine to create life-like characters, however not all games support this. Games which do support it are e.g. Clair Obscur: Expedition 33, Hellblade 2, inZOI and Silent Hill f. To know if a character in a game has a metahuman skeleton, if the face component has a lot of bones with names starting with FACIAL_, the skeleton is a metahuman skeleton and the expressions should work. The UUU will check this too and if the current selected actor doesn't contain a MetaHuman skeleton, it'll display a remark instead of the list of expressions.
MetaHuman expressions are an easy way to pose a character's facial features without the requirement to edit a lot of bones. As MetaHuman based faces have over 840 bones, it's very difficult to apply even basic expressions or even make the eyes move in a realistic way (with the eyelids correctly adjusted as well). The Metahuman expressions tab will make this much easier, all it takes is specify a weight value for one or more of the supplied expressions a value other than 0.0.
This works the same as with morph targets: a value of 1.0 applies the expression to the maximum to the bones in the face. A value of 0.0 removes the expression. A negative value moves the bones in the opposite directions and this could lead to interesting expressions as well. You can mix more than one expression at the same time. This means you can create truly unique facial expressions by mixing e.g. a small amount of one expression and a lot more of another expression.
There's no limit on the number of expressions you can mix together. Try to experiment, you can easily reset everything to go back to the start point. The expressions adjust bones in the bone tree. This means when you save the pose after adjusting the expression weight values, the expression you see on the character's face is saved as well.
Getting started with posing
Posing doesn't work if you have paused the game using the Numpad 0 pause (UWorld::IsPaused pause). If you want to pause the game, pause it with the PageDown
pause (Slomo pause). When the game is paused with Numpad 0, no bone logic is processed by the engine so your changes have no effect.
Posing a character starts by checking the Enable pose editing checkbox. When doing that, the animation of the character will pause and you can now change the position, orientation and scale of any bone in the skeleton, except the Root bone, as well as change morph targets, if available. If the character you selected has e.g. a spine bone, click that bone in the tree, and you'll see you can change values in the Bone Controls panel. Click and drag any of the values to change them and you should see the bone change. It can be the bone has no direct effect on your character but usually you'll see a difference. E.g. a spine bone, if you change one of the angles you'll see the character's torso will rotate in a given direction.
To quickly rotate/move/scale, hold Shift + dragging. To specify an exact value, Ctrl click on a value and to precisely drag a value, hold Alt while dragging the value. The sliders are more precise than the 3D gizmo, however the 3D gizmo offers some quick editing capabilities that might take longer with the sliders, so try both out to see what helps you the most when setting up your pose!
If the game supports Morph Targets, you can try these too, using the value next to the morph target you want to change on the Morph Targets tab. Sometimes morph targets don't have a lot of effect, however morph targets for e.g. face components can be quite expressive, so don't forget to try them out.
If the game has metahuman based characters, please utilize the MetaHuman expressions to easily apply an expression on your character's face.
Saving/loading a pose
You might want to re-use a pose for a character at a later time. To do this, you can save a pose by clicking Save pose... at the top. To load a pose you've saved previously, please click Load pose.... If you only want to e.g. load the scale or orientation of the bones in the pose, you can specify that with the Load options... button.
Keep in mind that bone data is stored per bone name. While it's common that different characters in a game share a great deal of bones, it's unlikely you can load a pose from game A into game B: the loading will succeed but your character likely will be totally messed up or it won't do anything at all.
If you have questions, they might have been answered in the FAQ section of this documenation site.
Importing a sub tree
You can import parts of a bone tree from a pose file. This can greatly speed up posing, e.g. when you have a pose with a given facial expression and you want to re-use that facial expression on the current pose of your character. To do this, first select the bone in the bone tree which you want to import. The bone you selected is the top of the tree you'll import, so all bones attached below that bone are also imported. After you've selected the right bone, click on the button 'Import subtree...'.
This will open the load pose window. By selecting a pose file, the UUU will lose the bone data of the sub tree you've selected from the pose file. Of course the pose in the pose file has to be compatible with the character you're importing the pose for.
The Atmospherics tab
The atmospherics tab offers the ability to control four components in a scene that form the foundation of anything related to atmospherics: Exponential Height Fog for fog related aspects, Directional Lights which are used to provide sun light or moon light, Sky Atmosphere which is used to control the sky color and light scattering and Volumetric Fog which is used for providing clouds.
Not every object might be present, or in the case of Directional Lights, there might be several available. In that case, hover over the particular light and the full name might tell you what the particular light is used for. If a component isn't available the particular section is empty.
To enable editing for a component, expand the section header and check the Edit checkbox for that particular section. To go back to the engine's settings, either uncheck the checkbox, or click the button at the bottom of the section to reset the component to the game's settings. To get help on a particular setting, please hover over the (?) visible on the right of the setting. Not all settings have help, some are e.g. equal to the light editor and therefore are discussed there. The Unreal Engine documentation for each component is linked below where you can find more information about the particular component and what each setting means.
Not all settings of a component are exposed in the editor e.g. because they only work when you're a developer in unreal editor (and have no effect on a game at runtime). I've included all settings that have an effect at runtime and have a reasonably big impact that changes are visible.
The interface might initially feel daunting, so just take it one component at a time; enable editing and try to change something. You can't ruin your game experience, as everything's reset to how it was afterwards.
If you use Numpad 0 pause (UWorld::IsPaused pause), it might be changes don't have any effect till you unpause.
Games which have a time of day cycle might reset any change you make. The UUU has built-in code for switching off time of day systems for several games (Borderlands 4, Avowed, The Outer Worlds 2 and Oblivion Remastered), but it might be your game isn't in this list. Sadly the UUU has to have built-in code to switch the systems off for the particular game as these systems are all custom made per game by the game developers so each game is different.
Exponential Height Fog
For the full documentation on the Exponential Height Fog component in games, please see: Unreal Engine Documentation on Exponential Height Fog.
Exponential Height Fog mainly exists of three parts: Main Fog, Second Layer Fog and Volumetric Fog. The Second Layer Fog is active when its Density is set to a value larger than 0. To control the color of the fog, first try the Volumetric Fog Albedo. The Main Fog In-scattering Color only works if the cvar r.SupportExpFogMatchesVolumetricFog is set to 0 on the console. Games usually set this to 1 to have a consistent color for all three parts.
To get a thick ground layer of fog in a valley for instance, use the Second Layer Fog and use a high Height Falloff value. This compresses the fog to a layer.
Directional Lights
For the full documentation on Directional Lights in games, please see: Unreal Engine Documentation on Directional Lights
There can be more than one Directional Light in a level, e.g. a sun and a moon, or even directional lights used to light a character separately. To know which one is the one you want to edit (e.g. you want to move the sun to another position), disable the light in the light list in the Directional Lights section. If all light disappears, that's the sun. If the light isn't enabled it can't be the light that's currently shining on the world.
Directional Lights work together with the Sky Atmosphere component for the overall sky color. E.g. a sun close to the horizon will cause more scattering through the horizon, causing a different sky color than when the sun is high in the sky. It might be good to first position the sun light where you want it to be and then edit the Sky Atmosphere component to control the final sky color.
To edit a light, click on the Edit button next to the light. It'll open a light editor panel, similar to the normal poinst/spot light editor. To position the light use the elevation and rotation settings. To get sharper or softer shadows use the Shadow source angle factor and the Light source angle values. The Light source angle setting also controls the size of the sun disc in the sky (unless the game uses a fixed disc graphic).
To get lightshafts, enable Lightshaft bloom and Lightshaft occlusion. It might be necessary to increase the fog values in the Exponential Height Fog to have the lightshafts show up.
Sky Atmosphere
For the full documentation on Sky Atmosphere in games, please see: Unreal Engine Documentation on Sky Atmosphere
The Sky Atmosphere component is used to control the light scattering in the atmosphere, which causes e.g. red sunsets and blue sunny skies. There are basically two types of scattering: light scattering because it bounces off air molecules (which is called Rayleigh scattering) and light scattering because it bounces off particles in the air like dust, pollen and water droplets (which is called Mie scattering).
The component offers control of both and some other settings to fine-tune the sky atmosphere looks. One key element to understand is the difference between scattering color and absorption color: the color you specify for scattering is the color scattered light will be offering, while the color you specify for absorption is the color that will be taken away. This means that by specifying a green color for e.g. Mie absorption, the color green will be 'absorbed' by the particles and thus will be less prominent in the light scattered by Mie scattering.
Volumetric Cloud
For the full documentation on Volumetric Cloud in games, please see: Unreal Engine Documentation on Volumetric Cloud
Volumetric Cloud is a component to control some aspects of how clouds are rendered in Unreal Engine. It might not be present in your game however, as some games use their own sky box rendering technique. It also doesn't offer an ability to control the actual cloud material and e.g. movement of clouds as in Unreal Engine that's done through the cloud material which is custom per game. You can still have some control how the sky looks however; by changing the cloud layer characteristics for instance as well as the tracing values, you can control how many clouds there are and how high they're reaching.
The pause tab
The pause tab offers the basic pause features, like pausing the game using the two different pause systems, as well as pausing NPCs. It additionally allows you to specify the gamespeed and/or NPC speed: first check the checkbox in front of the value, after which you can alter the value.
The lights tab
The lights tab offers the ability to create in-game lights, both spotlights and pointlights. There's more functionality in the overlay's Lights tab than in the client. The light editors of the in-game overlay offer a couple more features than the client's light editor. For details about what all the settings mean, please see the Lights section above.
The light settings are kept in sync with the client, so it doesn't matter which editor you're using. The light editor in the overlay offers a handfull more options than the client's light editor and are in general a bit smoother. If you want to have the full editing experience, it's best to use the overlay's light editors. Also the overlay allows you to attach lights to an actor and use Light presets (see below). Light presets can greatly speed up the process of setting up lights for your shot.
There's a single light editor, shared among all lights, similar to the client. A previous/next button at the top lets you navigate through all the lights in the scene. Additionally to the light editor, there's a group editor for editing lights in a group, which is discussed further below.
In the light list, The attach buttons use abbreviations: C > L means move camera to the light position and attach the light to the camera, L > C means move the light to the camera location and attach to the camera, L > A means attach the light to the currently active actor (if any).
Creating lights
To create a light you can use various options:
- without the overlay visible, press one of the shortcuts (default
Ctrl-Shift-Sfor a spotlight andCtrl-Shift-Pfor a pointlight, which will be created at the location of the camera) - On the Lights tab, click either the button 'New spotlight' or 'New pointlight' below the group you want the light to be in. If no actor is active, you can only create lights attached to nothing. If an actor is selected you can create a light attached to that actor by using the buttons below that actor in the light list
- On the Lights tab, click the 'New from preset' button, which will bring up the window showing all known Light presets. See the table below for the presets that are shipped with the UUU. You can create your own as well. This is explained further below.
You don't need to go back to the Actor manipulation tab to select an actor. Just click an actor (e.g. your character) in the world when the Lights tab is visible, it'll make that actor the active actor so you can attach a light right away.
Light presets
The UUU ships with a couple of presets to get you started. These are made after the lighting tutorial on oxpal. You should be able to re-create all light setups in that tutorial with the presets available by default.
You might need to rotate a light after creating to get the exact same setup. Also, the presets were created in a scene without sunlight. So in your scene it might be needed to increase the intensity of the light, and depending on the game / engine version, you might need to adjust shadow settings. All presets use a white light.
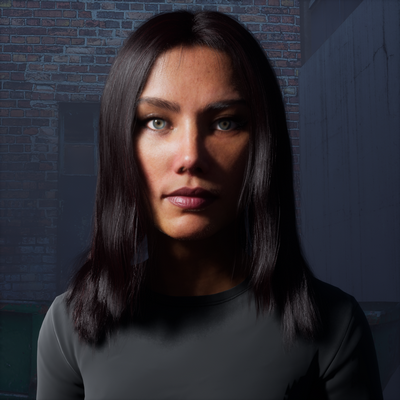
Examples of preset usage. Some examples below use two presets at the same time.
 |
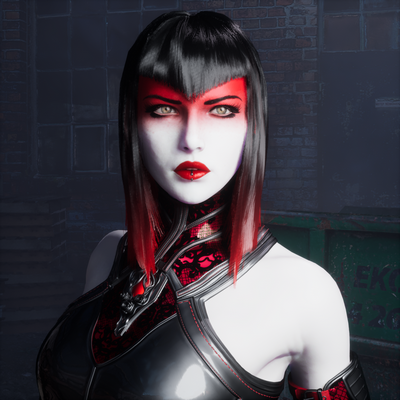
Butterfly A light directly in line with the center of the subject's face. There's an even shadow below the nose, which shouldn't reach the upper lip. |
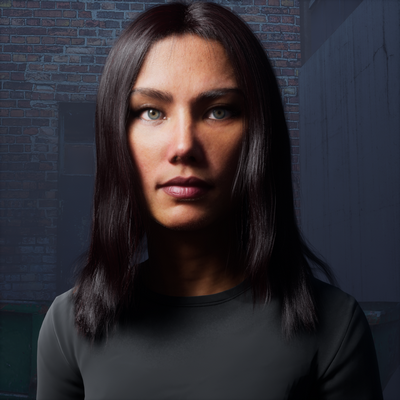
 |
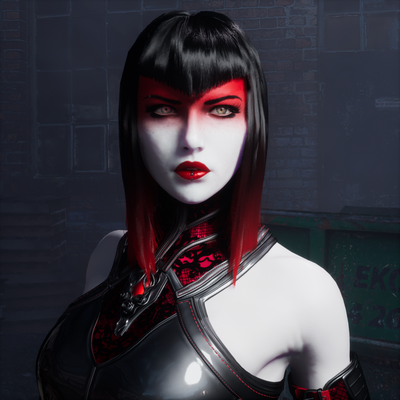
Key with close softbox A softbox with soft shadows that is close to the Rembrandt light setup. |
 |
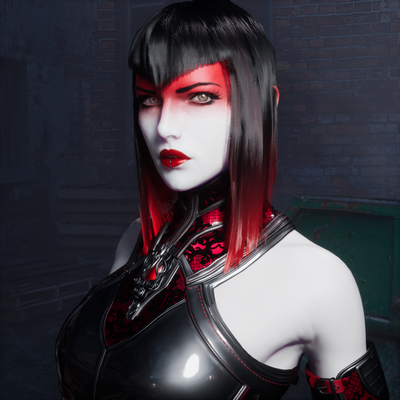
Loop Similar to the Rembrandt setup but the shadow from the nose creates a loop pointing towards the corner of the mouth. There are two loop presets, one on the left and one on the right of the face. |
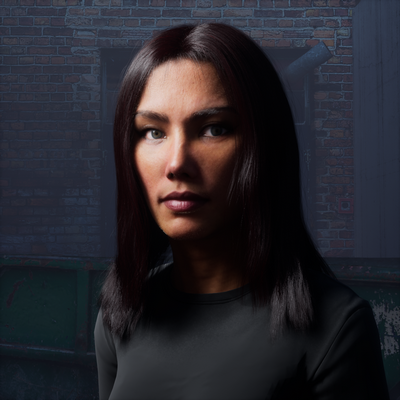
 |
Rembrandt Broad A light coming from the right using soft shadows. |
 |
Rembrandt with Honeycomb Classic Rembrandt setup with the lit triangle on one of the cheeks, however sharper shadows are used for a harsher look. |
 |
Rembrandt with Silver Brolly A Rembrandt setup with a diffuse light that casts very soft shadows. |
 |
Rembrandt with Softbox A classic Rembrand setup with soft shadows. |
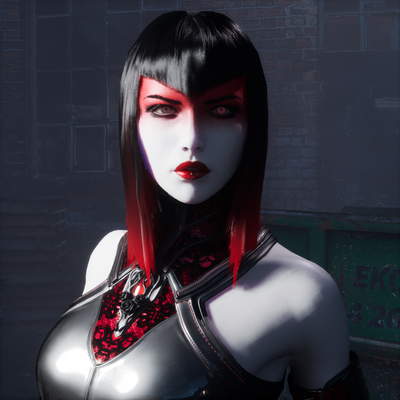 |
Split A setup with light coming from the side where the shadow runs down the middle of the face. |
 |
Split with Fill right A setup with two presets: a fill light coming from the right and the Split preset. |
Light visualizers
Light Visualizers are in-game objects to show you where your lights are and in what direction they're pointing. For spotlights an arrow and a cone, the size of the spotlight cone is placed at the location of the light and it points in the same direction as the spotlight. For pointlights a 6-arrow object is placed at the location of the pointlight. Additionally, the visualizers offer a way to select the light by clicking on the circle that's rendered at the spot where the light is.
The visualizers are shown when the in-game overlay is shown, the lights tab is the active tab and visualizers are enabled. Selecting another tab in the in-game overlay or disabling the overlay entirely will hide the visualizers as well. The light's effective color (light color + temperature setting) will also be used for the visualizer's color. Disabling a light will dim the visualizer and make it semi-transparent.
When the light is selected in the 3D world, it will become the active light and the gizmo (if enabled) will be placed on that light. This helps with moving and rotating the lights in your scene without the necessity to attach the lights to the camera for movement.
To toggle the visualizers on / off you can use the button on the Lights tab in the client or the checkbox on the Lights tab. Additionally you can use the assigned key (be sure to enable keyboard throughput to the tools using the overlay's topleft menu). By default the keyboard shortcut is ;, but you can change this in the Keybindings tab. Especially users using a non-US keyboard would likely want to bind a different key for this.
Light gizmo's
The gizmo's work the same as with the actor manipulation tab: they offer a 3D axis system to move the light in the 3D world and for the spotlight they also offer a way to rotate the light over the 3 axis. Pointlights don't have these rotation options as the rotations are over the world axis and not the local rotations. For rotating the light in-place, please use the rotation values in the light editor itself.
Light gizmo's aren't shown on lights which are attached to an actor or attached to the camera. This is because they're controlled by other means and, in case of the light being attached to the actor, the light is often off-camera when setting up the shot, making the gizmo impractical.
Editing lights as a group
When one or more lights are attached to an actor, you can edit the lights as a group. To do so, click the 'Edit group' button below the light list of the actor. This will open a separate editor for light properties as the usual light editor. All settings are set to 0 and changing them will change the setting for all lights in the group for the amount you changed the setting, then the setting will flip back to 0. So e.g. if you change the 'Relative angle' setting with e.g. 2.0, then the Relative angle value of all lights in the group will be increased with 2.0. This allows you to e.g. rotate all lights around an actor in one go or dim all lights' intensity setting a bit.
The overlay settings
When you open the overlay, at the top of the screen you'll find a menu bar with some status messages if you e.g. have enabled the camera or paused the game. The settings menu for the overlay is on the top left, where you'll find a couple of settings to make your life easier when working with the overlay. The settings are straightforward and stored per game.
Games that work with the UUU
Although the name suggests it's a universal unlocker that always works with any Unreal Engine 5 game, the reality is that developers sometimes change the game engine's code and the unlocker can't re-activate the console as essential functions aren't there anymore, or activate other features offered by the UUU. The list below are games which are known to work with the unlocker.
The Lights column mentions all games which have been verified that the custom lights work. It might very well be the lights work in many other games on this list. If you play one of these games and the lights work for these games but it's not marked as such on this list, please let me know.
If you're pausing with PageDown (slomo pause), and have motion blur enabled in the game's settings (or it's enabled by the game and you can't disable it in the game settings) you'll likely see motion blur streaks / blurry edges when moving the camera in games. To disable this, please use
r.motionblurquality 0 on the console to disable motion blur. To enable it again specify a value higher than 0.
| Title | Notes | |
|---|---|---|
| The 9th Charnel | ||
| 12, Memory Lane | ||
| 1348 Ex Voto | Tested on demo | |
| 93, Kuindzhi | ||
| A Dual Ascent | ||
| A Fighter’s Nova: Mindara | Tested on demo | |
| A Quiet Place: The Road Ahead | ||
| A.I.L.A | Tested on demo. | |
| Abiotic Factor | ||
| Across the Wonderlands | Requires UUU v5.4+. Tested on demo. | |
| Acts of Blood | Tested on demo. | |
| Adorable Adventures | Tested on demo | |
| The Adventures of Elliot: The Millennium Tales | Tested on demo | |
| AFTERBLAST | Tested on demo. | |
| Akimbot | ||
| Alien: Rogue Incursion Evolved Edition | ||
| The Alighieri Circle Dante's Bloodline | Tested on demo | |
| The Alters | Test on demo | |
| Amber Alert | ||
| Ambrosia Sky: Act One | Tested on demo | |
| American Arcadia | ||
| Among the Trolls | Tested on demo | |
| Aphelion | Del (HUD Toggle by default) also pauses the game, so you have to rebind that in the keybindings. Using PageDown (slomo) pause won't unpause, unless you set the gamespeed to 1.0. This is due to a change in the engine. | |
| ARK: Survival Ascended | No Numpad 0 pause, no lights. Tested on early access. | |
| Armatus | Tested on demo. Clicking on an actor crashes the demo. | |
| ASHGARD: Infinity Mask | Tested on demo | |
| ASPIS | Tested on demo | |
| ASTROBOTANICA | ||
| Atmosfar | Tested on demo | |
| Auto-Crisis | ||
| Avowed | Slomo pause requires UUU v5.4.8 | |
| The Awakener: Battle Tendency | Tested on demo | |
| Awaysis | Tested on demo | |
| The Axis Unseen | Requires 5.4+. Tested on demo. | |
| Banishers: Ghosts of New Eden | Numpad 0 pause will hide your weapons after a few seconds. You might want to rebind some keys as they conflict with some game keybindings. | |
| Barkour | Tested on demo | |
| The Bench | Tested on demo. | |
| Beyond Hanwell | ||
| Beyond the Darkness | ||
| Big Helmet Heroes | ||
| Black Myth: Wukong | Console doesn't open, add the console key to the input ini file as described in this document. HUD toggle might not work. | |
| BLACKSHARD | ||
| Bleak Haven | Tested on demo | |
| Borderlands 4 | Use UUU v5.7.2 or higher. Set 'Slomo Pause Type' to 'TimeDilation' on the configuration tab. Pose tool editor not available. Lights don't have much shadow capabilities. | |
| Brew | ||
| Breathedge 2 | ||
| BrokenLore: DON'T WATCH | ||
| BrokenLore: UNFOLLOW | ||
| BULT: Hunting simulator | ||
| Burning Sword Death Sun | Tested on demo. | |
| Bylina | ||
| Call of the Elder Gods: First Chapter | Tested on demo | |
| Captured | ||
| Captured 2 | ||
| Caravan SandWitch | ||
| The Caribou Trail | ||
| Carmageddon Rogue Shift | ||
| The Casting of Frank Stone | Pausing using slomo pause (PgDn) causes issues with a hanging game at times. Pose editor not available. Tested on demo. | |
| Causal Loop | Tested on demo | |
| Chernobylite 2: Exclusion Zone | Tested on demo. Pose editor supported in UUU v5.4.10 | |
| Chip ‘n Clawz vs. The Brainioids | Tested on demo. | |
| The Chronos Event | Tested on demo | |
| CHUXIE | ||
| Citzen Pain | Tested on demo. Face posing doesn't work | |
| Clair Obscur: Expedition 33 | Use UUU v5.4.11 or higher. To have a character catch a custom light, it might be needed to select the 3rd light channel on a light (at the bottom). Use r.postprocessing.disablematerials 1 to get rid of the smear/extra sharpening. When using the mouse to rotate the camera, it won't work in cutscenes with dialog or combat. Use the keyboard instead (or a gamepad). |
|
| Cloudheim | Tested on demo | |
| Code Vein II | Tested on demo. Requires v5.8.6+. Hotsampling works best when the game is ran in Borderless windows (which is the default). | |
| Commandos: Origins | Requires UUU v5.4+. Tested on demo. Near view plane of the camera is very far away causing near plane clipping. | |
| The Complex: Expedition | No controller support for the camera. | |
| Conan Exiles Enhanced | Console doesn't work. | |
| Cosmic Fear | ||
| Creatures of Ava | Tested on demo | |
| The Crimson Maid | ||
| Crisol: Theater of Idols | Tested on demo | |
| Cronos: The New Dawn | Requires UUU v5.7.1+ | |
| Cthulhu: The Cosmic Abyss | Tested on demo | |
| Daemon X Machina: Titanic Scion | Tested on demo | |
| Darker Skies: Remastered for PC | ||
| Darwin's Paradox! | Tested on demo | |
| DAVY x JONES | ||
| Dead as Disco | Requires UUU 5.5.2+ Tested on demo. | |
| Dead Take | ||
| Deadzone Rogue | Requires UUU v5.4+. Tested on demo. | |
| Death Relives | ||
| DEFICIT | tested on demo. | |
| Descensus | Tested on demo | |
| Demonologist | ||
| Denshattack! | Tested on demo. | |
| Desordre : A Puzzle Game Adventure | ||
| Devil of the Plague | Tested on demo | |
| Directive 8020 | Use UUU 5.8.14 or higher. Check on the UUU configuration tab 'Use engine default for Slomo min. value'. To avoid pause on alt-tab, set 'Block focus loss' to Method A. To get rid of the black bars in cutscenes, type on the console r.SMG.ScissorRectAspectRatioOverride.Enable 0 |
|
| Directorate Novitiate | Tested on demo | |
| Disorder | ||
| Don't scream | ||
| Double Dragon Revive | ||
| DRAGON BALL: Sparking! ZERO | HUD toggle doesn't fully toggle the hud. | |
| Dragonkin The Banished | ||
| DragonSword: Awakening | Tested on demo | |
| Dreadmoor | Inject during gameplay | |
| Dream Eaters.exe | Tested on demo. | |
| Drift Island | ||
| Duck Side of the Moon | Tested on demo. | |
| Duskfade | Tested on demo. | |
| Easy Breezy Drive | ||
| Echoes of Aincrad | No pose tooling. Use UUU v5.8.18 or higher for the full game. | |
| Echoes of the End | Insert opens the console, so it might be wise to bind another key to 'Enable camera'. Use UUU v5.6.3 or higher | |
| Echoes of Yi Samsara | ||
| Edge of Memories | Tested on demo. | |
| The Elder Scrolls IV: Oblivion Remastered | ||
| EMOTIONLESS : The Last Ticket | ||
| Empire of the Ants | Requires UUU v5.4+. Tested on demo | |
| Empyreal | Tested on demo | |
| ENDER MAGNOLIA: Bloom in the Mist | ||
| Eona | Tested on demo | |
| Eriksholm: The Stolen Dream | Tested on demo. All in all pretty limited, so the UUU is hardly usable. | |
| Ertugrul of Ulukayin | Tested on demo | |
| Eternal Strands | For actor selection/manipulation, use UUU v5.4.4 or higher | |
| Everspace 2 | Latest versions are on UE5 | |
| Everwind | Tested on demo | |
| The Exit 8 | ||
| The Fabled Woods | ||
| Fading Echo | Tested on demo | |
| Fading Skies | Tested on demo | |
| FATAL FURY: City of the Wolves | ||
| Fatekeeper | Tested on early access. | |
| Fear the Timeloop | Tested on demo | |
| Firmament | ||
| Flint Treasure of Oblivion | ||
| Floralis | Tested on demo | |
| Fluffy Sailors | Tested on demo. | |
| Forever Winter | Requires UUU 5.4+ | |
| Fort Solis | Use PgDn pause to pause the game, pausing with Numpad 0 won't let you move the camera. DoF sliders in postprocessing don't work. | |
| Frostpunk 2 | Tested on beta. | |
| Funeralopolis: Last Dev | ||
| Furnish Master | ||
| Game of Thrones Kingsroad | No poses | |
| Garten of Banban 2 | Tested on demo | |
| GearGrit | Tested on demo. | |
| Godbreakers | Tested on demo | |
| GORE | Tested on demo. Console requires key being registered in ini file. | |
| Gori Cuddly Carnage | ||
| Gothic 1 Remake | ||
| Graveyard Shift | ||
| Grounded 2 | Pose editor requires UUU v5.6.4+ | |
| Guardians of the Wild Sky | Tested on demo | |
| Half sword | Tested on demo | |
| Halo Campaign Evolved | Requires UUU v5.8.20+. No pose tooling. | |
| Hell is Us | Tested on demo | |
| Hellblade 2: Senua's Saga | Requires UUU v5.1.6+. To get rid of the CA/lens distortion, use: r.NT.Lens.Distortion.Intensity 0, r.NT.Lens.Softness.Intensity 0 and r.NT.Lens.ChromaticAberration.Intensity 0 on the console. For hotsampling, run the game as 'Fullscreen' (which is borderless fullscreen) and specify on the console: r.NT.EnableConstrainAspectRatio 0. This will also get rid of the black bars on a 16:9 screen. To disable the Depth of Field you can do that on the Post processing tab or by using r.DepthOfFieldQuality 0 on the console. |
|
| High on Life 2 | ||
| Hillside | Tested on demo | |
| Hirogami | Tested on demo | |
| Homeless | ||
| Honeycomb: The World Beyond | Tested on demo. | |
| Hords of Hunger | Tested on demo. | |
| The House of Hikmah | Tested on demo | |
| Hozy | ||
| Hubert | Tested on demo. | |
| HYPNOS | Tested on demo | |
| I'm counting to 6 | ||
| I Know This Place.. ? Chapter II | ||
| IfSunSets | ||
| ILA: A Frosty Glide | Tested on demo. | |
| Immortals of Aveum | ||
| Invincible VS | ||
| Inzoi | ||
| Isopod: A Webbed Spin-off | Tested on demo | |
| It Reaches | Tested on demo | |
| Jujutsu Kaisen Cursed Clash | ||
| Jusant | Tested on demo | |
| KARMA: The Dark World | ||
| Keeper | Black bars aren't removed | |
| Kiborg | Tested on demo | |
| LANESPLIT | ||
| Layers of Fear | ||
| Lego Batman: Legacy of the Dark Knight | Use UUU v5.8.15 or higher | |
| Life is Strange: Double Exposure | Slomo/PgDn pause doesn't work in cinematics (Use Numpad 0) | |
| Life is Strange: Reunion | UUU v5.8.9+ is recommended. | |
| The Lightkeeper | ||
| Liminal Exit | ||
| Liuyin's world | Tested on demo. | |
| LOLLIPOP CHAINSAW RePOP | No blackbar removal | |
| Lords of the Fallen (2023) | Requires UUU v5.0.7+. Requires Easy Anti-Cheat disable. Do this either by using FLiNG's trainer or by using method 2 from this fearless thread. This will disable achievements and you can't play online. | |
| Lost Records: Bloom & Rage | ||
| Luminary | Tested on demo | |
| Lushfoil | ||
| Luto | Black bars are removed with the HUD toggle. | |
| Manor Lords | ||
| Mechaknights Legends | Tested on demo | |
| Mercy Incore | Tested on demo | |
| Metal Eden | Tested on demo | |
| Metal Garden | ||
| Metal Gear Solid Delta: Snake Eater | No character posing. Use UUU v5.6.5 or higher. | |
| The Midnight Walk | ||
| Militsioner | Tested on playtest | |
| Mixtape | Console might not work if you inject in-game, try injecting the UUU at the main menu. | |
| Monterona | ||
| Moroi | ||
| MotoGP 25 | ||
| Mororslice | No hud toggle> Tested no demo. | |
| Mortal Shell 2 | Tested on open beta | |
| My Dear Emma | Tested on demo | |
| Myrmidon | Tested on demo | |
| Myst | ||
| The Mystery of William Moore | ||
| Nathan Morgan - Dilemma | ||
| Necrophosis | ||
| Nedra | Tested on demo | |
| New Arc Line | Requires UUU v5.4+. Tested on demo | |
| Ninja Gaiden 2 Black | No Slomo pause. Tested on gamepass version, no pose tools | |
| No Sun to Worship | ||
| Nobody wants to die | Use 5.2.2+ for a proper HUD toggle | |
| Norse : Oath of blood | No HUD toggle, tested on demo | |
| Obey the voice | ||
| The Occultist | Tested on demo | |
| The Office Rooms | ||
| Once Alive | ||
| One Last Breath | ||
| One Way Home | No hotsampling for some strange reason. | |
| Once Alive | ||
| Orcs Must Die! Deathtrap | HUD toggle doesn't work | |
| Otherskin | Tested on demo | |
| Out of Sight | Tested on demo. | |
| The Outer Worlds 2 | Use UUU v5.7.7+ for all features. Check 'Use engine default for slomo pause' on the configuration tab. | |
| Outpost: Infinity Siege | ||
| Outside the Blocks | Tested on demo | |
| Painted in Blood | Tested on demo | |
| Palworld | ||
| The Path Into The Abyss | Tested on demo | |
| Peregrino | ||
| Permafrost | Requires UUU v5.4+. Tested on demo | |
| Pine Harbor | ||
| Platform 8 | ||
| Pneumata | ||
| Poppy Playtime, chapter 4 | ||
| Poppy Playtime, chapter 5 | Overlay is unusable due to mouse problems. | |
| Post Trauma | ||
| Project Vesperi | Requires UUU v5.4+. Tested on demo. | |
| Pseudoregalia | ||
| Purpose 1951 | ||
| RailGods of Hysterra | Tested on demo | |
| Reanimal | Tested on demo | |
| Recharge | Tested on demo | |
| Regeneration | Tested on demo | |
| Remnant II | ||
| Revenge of the Savage Planet | ||
| Ride 6 | Console doesn't open, add the console key to the input ini file as described in this document. | |
| The Riese Project | ||
| Rivage | Tested on demo | |
| Rivals of Aether II | Tested on demo | |
| Riven | ||
| Robin Hood - Sherwood Builders | ||
| RoboCop: Rogue City | Requires UUU v5.0.7+. Tested on demo. | |
| RoboCop: Rogue City - Unfinished Business | ||
| Robots at Midnight | ||
| Romeo is a Dead Man | ||
| Rooftops & Alleys: The Parkour Game | ||
| Routine | ||
| RUNNING TRAIN | 走ル列車! | |
| Samsom | ||
| Sancticide | ||
| Satisfactory | Use UUU v5.8.17+ | |
| Scaravan 66 | Tested on demo. | |
| Scholar's Mate | ||
| Screamer | ||
| Serum | ||
| Shadows of Kepler | Tested on demo | |
| ShantyTown | Tested on demo | |
| Silent Hill 2 Remake | No pose editor | |
| Silent Hill f | Use UUU v5.7.4+. Posing the character can be a bit problematic as the bone trees of the head mesh and the other meshes don't align. So you likely will have to reposition e.g. the hair after moving the head. | |
| The Sinking City Remastered | ||
| Slender: The Arrival | ||
| Slitterhead | ||
| Solasta II | Tested on demo. | |
| Somber Echoes | ||
| Song of Nunu: A League of Legends Story | ||
| Sparkhunt | Tested on demo | |
| Spellsided | ||
| Spirit of the North 2 | ||
| Spirit X Strike | Tested on demo | |
| SpongeBob SquarePants: Titans of the Tide | Tested on demo | |
| Sprawl Zero | Tested on demo. Needs UUU v5.8.18 or higher. | |
| Squirrel with a Gun | ||
| S.T.A.L.K.E.R 2: Heart of Chornobyl | Use UUU v5.8.5 or higher | |
| Star Overdrive | Tested on demo | |
| Steel Seed | ||
| Still Wakes The Deep | ||
| Stonemachia | ||
| STORROR Parkour Pro | ||
| The Strange City | ||
| Stray Souls | Tested on demo | |
| Stygian: Outer Gods | Tested on demo | |
| Styx: Blades of Greed | Tested on demo | |
| Subnautica 2 | ||
| Sumerian Six | ||
| Super Meat Boy 3D | Tested on demo | |
| Supernatural | ||
| Supernormal | ||
| SurrounDead | ||
| Sword Art Online Fractured Daydream | ||
| Sword of the Sea | Use UUU v5.6.4 or higher. Numpad 0 paused the game but after that the menu won't show again when you press ESC or the menu button on your controller, so use PgDn pause! |
|
| The Talos Principle: Reawakened | Tested on demo. No console. | |
| The Talos Principle 2 | ||
| Tankhead | ||
| Tekken 8 | Requires UUU v5.1.1+. Tested on demo. Gamespeed / PgDn pause don't work. Some other features might not work like character movement. Outside, lights might need a very high intensity. Pose editor won't work. | |
| Tempest Rising | Tested on demo | |
| The Thaumaturge | ||
| This Bed We Made | ||
| Tides of Tomorrow | ||
| Titanic Project 401 | Tested on demo | |
| Towerborne | ||
| Towers of Aghasba | ||
| Town To City | Tested on demo | |
| Torque Drift 2 | ||
| Trench Tales | ||
| Two Falls (Nishu Takuatshina) | Tested on demo | |
| Tribe: Primitive Builder | ||
| Trident's Tale | Tested on demo. | |
| Trizna | Tested on demo. | |
| Ultimate Hunting | Tested on demo | |
| Until Dawn | There are fov issues when the game switches camera PoV, enabling/disabling the camera fixes it | |
| UNYIELDER | Tested on demo | |
| Valor Mortis | Tested on pre-alpha playtest | |
| Vampire: The Masquerade - Bloodlines 2 | Use UUU v5.7.6 or later. Inject the UUU after you've loaded a save. | |
| Vampiress: Eternal Duet | Tested on demo | |
| The Vanished Soul | Tested on demo | |
| Vesnith Tapes | ||
| VHOLUME | Tested on demo | |
| Villa Nocturne | Tested on demo | |
| Vilde | Tested on demo | |
| Vindictus: Defying Fate | Tested on alpha test. | |
| Virtue and a Sledgehammer | Tested on demo. | |
| VOID/BREAKER | Tested on demo. | |
| Voidling Bound | Tested on demo. Use 5.8.16+ for hud toggle to work. | |
| Voyagers of Nera | Tested on demo. No console. | |
| Wilderings: The Lost Spring | Tested on demo | |
| WILL: Follow the Light | Tested on demo | |
| Windrose | ||
| Wizard of Legend 2 | Tested on demo | |
| Where They Go | Tested on demo | |
| Wonderfall | Tested on demo | |
| Wuchang: Fallen Feathers | ||
| Zoochosis |
Dumping object information
The UUU can dump the object store with the memory locations, names, types, structure and more of all currently active engine objects a text file in the game folder, called UUU_ObjectsDump.txt. To do that, on the Available features tab, click the Dump object info button. The memory addresses listed in the file differ per level and every time you run the game, so if you want to look up objects in-memory after you've loaded a new level, you have to dump the file again.
Dumping cvars
The UUU can dump cvars (console variables) and console commands with their name, current value, their type and help text to a text file. This text file will be placed in the game folder, called UUU_CVarsDump.txt. Additionally, they're also written to a .json file in Json format, in the same folder, with the filename UUU_CVarsDump.json. To dump the cvars, on the Available features tab, click the Dump CVars button. This dump will not only include all default UE5 cvars and console commands but also custom ones added by the game developer.
After you've dumped the cvars to a file, open it in notepad or other text editor. For a particular cvar, the dumped information in the text file looks like this:
foliage.LODDistanceScale | Float | 1.000000 | 0x0 (SetByConstructor)
        Scale factor for the distance used in computing LOD for foliage.
This tells you: the variable foliage.LODDistanceScale is a floating point variable, has currently the value 1.0, has no special flags, and
has as help text Scale factor for the distance used in computing LOD for foliage. See for more information how to read and change console variables
Opening the in-game console.
When you dump the cvars, the UUU will reset flags that prohibit you from executing certain commands and setting certain cvars which set to readonly or are cheats. This doesn't mean they'll work or have any effect (as that depends on the final engine code being included in the game), but at least you can change their value and execute these commands.
Information recorded with camera path nodes
When you create a Camera path, each node records the camera location, orientation and field of view. Additionally, the post processing settings: Auto exposure bias, Depth of field focal distance, Depth of field f-stop and Vignette intensity are recorded as well.
Saving/restoring camera state
After you've enabled the camera (default with Insert), you can store the current camera state in three slots. The camera state is the current location,
the orientation/rotation of the camera and the FoV, as well as other information recorded in camera path nodes, as the system uses camera path nodes under the hood.
By default you save the camera state by using
Ctrl + F1 for saving the current camera state in slot 1, Ctrl + F2 for saving the current camera state in slot 2 and
Ctrl + F3 for saving the current camera state in slot 3. To restore the camera state to a saved state, press F1 to restore the camera to the state saved
in slot 1, press F2 to restore the camera to the state saved in slot 2 and, press F3 to restore the camera to the state saved
in slot 3. These keys are configurable in the keybindings tab.
When you disable the camera again, the saved states are lost. If you want to preserve game states after you disabled the camera (e.g. you want to move the character a bit, and then enable the camera again), use a camera path and add the camera states you want to save as nodes. Camera paths are preserved after you disable the camera.
Controls
The default photomode mod controls are listed below. It depends on the Camera control device setting on the Configuration tab whether the device (e.g. mouse or gamepad) can control the camera.
Mouse
When moving the mouse:
- No mouse buttons pressed: rotate the camera
- Left button pressed: move camera up / down / left / right
- Right button pressed: move camera forward / backward / left / right
- Both left and right button pressed: tilt camera left / right
- Mousewheel: increase / decrease Field of View (FoV)
When you are holding Ctrl, rotation/movement is slower. When you are holding Alt, rotation/movement is faster.
When moving the mouse and holding Shift:
- No mouse buttons pressed: player pawn rotation left / right
- Left button pressed: move player pawn up / down / left / right
- Right button pressed: move player pawn forward / backward / left / right
Keyboard
Normal camera usage
| Key | Feature |
|---|---|
Insert |
Enable / Disable the camera |
Numpad . |
Block / Unblock input to game |
Numpad - |
Decrease FoV (+ Ctrl: slower) |
Numpad + |
Increase FoV (+ Ctrl: slower) |
Numpad * |
Reset FoV |
Home |
Lock / Unlock camera movement |
Numpad 4 |
Move camera left (+ Ctrl: slower, + Alt: faster) |
Numpad 6 |
Move camera right (+ Ctrl: slower, + Alt: faster) |
Numpad 8 |
Move camera forward (+ Ctrl: slower, + Alt: faster) |
Numpad 5 |
Move camera backward (+ Ctrl: slower, + Alt: faster) |
Numpad 7 |
Move camera up (+ Ctrl: slower, + Alt: faster) |
Numpad 9 |
Move camera down (+ Ctrl: slower, + Alt: faster) |
Numpad 4 |
Move camera left (+ Ctrl: slower, + Alt: faster) |
Arrow key Up |
Rotate camera up (+ Ctrl: slower, + Alt: faster) |
Arrow key Down |
Rotate camera down (+ Ctrl: slower, + Alt: faster) |
Arrow key Left |
Rotate camera left (+ Ctrl: slower, + Alt: faster) |
Arrow key Right |
Rotate camera right (+ Ctrl: slower, + Alt: faster) |
Numpad 0 |
Pause / Unpause the game (Using UWorld::IsPaused) |
Page Down |
Pause / Unpause the game (Using slomo 0) |
Page Up |
Skip a few frames when paused |
Numpad 1 |
Tilt camera left (+ Ctrl: slower, + Alt: tilt 90 degrees left) |
Numpad 3 |
Tilt camera right (+ Ctrl: slower, + Alt: tilt 90 degrees right) |
Numpad 2 |
Reset tilt |
Delete |
Toggle HUD |
F1 |
Restore the camera state to the state saved in slot 1 (+ Ctrl: store current state in slot 1) |
F2 |
Restore the camera state to the state saved in slot 2 (+ Ctrl: store current state in slot 2) |
F3 |
Restore the camera state to the state saved in slot 3 (+ Ctrl: store current state in slot 3) |
Camera path usage
| Key | Feature |
|---|---|
F7 |
Start / pause playback |
F8 |
Stop playback |
F4 |
Add path |
Ctrl-F4 |
Delete active path |
F10 |
Add node to active path |
Ctrl+F10 |
Replace the active node on the active path |
Alt+F10 |
Insert a new node in front of the active node on the active path |
Shift-F10 |
Insert a new node after the active node on the active path |
Ctrl-F9 |
Delete active node on the active path |
Ctrl+Home |
Go to start of active path |
Ctrl+End |
Go to end of active path |
Ctrl+Page Up |
Go to previous node on active path |
Ctrl+Page Down |
Go to next node on active path |
Numpad 1 |
Select the first path during playback (if any) |
Numpad 2 |
Select the second path during playback (if any) |
Numpad 3 |
Select the third path during playback (if any) |
Numpad 4 |
Select the forth path during playback (if any) |
Numpad 5 |
Select the firth path during playback (if any) |
Numpad 6 |
Select the sixth path during playback (if any) |
Numpad 7 |
Select the seventh path during playback (if any) |
Numpad 8 |
Select the eighth path during playback (if any) |
Numpad 9 |
Select the ninth path during playback (if any) |
Lights usage
| Key | Feature |
|---|---|
Ctrl-Shift-S |
Create a new spotlight at the location of the camera |
Ctrl-Shift-P |
Create a new pointlight at the location of the camera |
Ctrl-Shift-A |
Move the camera to the active light and attach the light. This will always preserve the camera's location |
Ctrl-Shift-L |
Move the active light to the camera and attach it. This will always preserve the camera's location |
Ctrl-Shift-D |
Detach the active light from the camera. The camera will move to its preserved location when the light was attached |
Ctrl-Shift-C |
Create a copy of the active light at the camera's location |
; |
Toggle light visualizers |
Miscellaneous usage
| Key | Feature |
|---|---|
Alt-\ |
Toggle gamespeed override |
Alt-[ |
Decrease gamespeed. |
Alt-] |
Increase gamespeed. |
Ctrl-/ |
Toggle NPC speed override |
, |
Decrease NPC speed |
. |
Increase NPC speed |
End |
Toggle NPC pause |
As some of these are keys that are placed on different spots on keyboards for different languages, you might want to rebind these keys for your particular keyboard if they don't function properly.
Gamepad
Normal camera usage
| Control | Feature |
|---|---|
| Left stick | Move camera forward / backward / left / right |
| Right stick | Rotate camera |
| Left trigger | Move camera up |
| Right trigger | Move camera down |
| D-pad up / down | Decrease (zoom in) / Increase (zoom out) FoV |
| B button | Reset FoV |
| Y button + left / right stick | Faster movement / rotation |
| X button + left / right stick | Slower movement / rotation |
| X button + D-pad up / down | Slower FoV increase / decrease |
Camera path usage
| Control | Feature |
|---|---|
| Start | Start / pause playback |
| Back | Stop playback |
| Left bumber | Go to previous node on active path |
| Right bumper | Go to next node on active path |
| A | Add node to active path |
Miscellaneous usage
| Control | Feature |
|---|---|
| X button + pressing left stick | Toggle gamespeed override |
| X button + left bumper | Decrease gamespeed. |
| X button + right bumper | Increase gamespeed. |
| A button + left stick | Move player pawn left / right / forward / backwards |
| A button + right stick | Rotate player pawn left / right |
| A button + left trigger | Move player pawn up |
| A button + right trigger | Move player pawn down |
Credits
Development: Otis_Inf
Research: v4, v5: Otis_Inf. v3: Otis_Inf and SunBeam
Logo: Ichisake
Special thanks to Pino44io for testing.