IGCS Depth of Field
| Latest version | v2.6.0 |
| Released on | 23-apr-2026 |
| Compatible with | Reshade 6.4+ and newer Otis_Inf camera tools. |
| Download latest version | IGCS Connector on GitHub |
The IgcsConnector works with most newer cameras. To be sure, go to the camera's page on this site and if in the table at the top of the page it says "Supports IGCS DOF: Yes" then the IGCS Depth of Field is supported with that game.
If the game doesn't use Unreal Engine or its camera isn't listed on this site, then it won't work. The camera tools are required to make the DoF function.
In this document the version of reshade that's mentioned is e.g. 6.4+. This means you need reshade version 6.4 or higher (so preferably, the latest version).
Installation
IGCS Depth of field is built into the IGCSConnector, a ReShade addon which communicates between ReShade effects and Otis_Inf's camera tools. To use it, you need the latest release and ReShade v6.4 or higher with Addon support.
After you've downloaded the latest release, unpack it in a folder. You'll now have the following files:
- a file called
IgcsConnector.addon64, this is the addon for reshade - a folder called
Shaderswith one file:IgcsDof.fx.
Installing ReShade
To obtain ReShade v6.4+ (so preferably, get the latest version!) with addon support, go to https://reshade.me and click on Download, then on the bottom green button to download the ReShade version with Add-on support. This comes with a handy installer, which you should run before proceeding. It'll install Reshade and optionally the shaders you've selected with your game. For more information how to setup ReShade, please read this guide.
To get the latest version of IGCSDOF, please go to the the latest release page, as the reshade installer you might have or which is available on the reshade website might not have been updated yet.
Installing the IgcsConnector.addon64 addon
After you've installed reshade, you're ready to install the IgcsConnector addon. Place the Igcsconnector.addon64 in the same folder as where
the game exe is located. This is in most cases the same folder as where the ReShade 6.4+ dll ('dxgi.dll') is located. Only for games which use Vulkan,
the ReShade dll is likely elsewhere. For Unreal Engine powered games there might be two game exe's: one in the game's installation folder,
and one in a folder deeper into that folder, e.g.
GameName\Binaries\Win64\GameName-Win64-Shipping.exe; the IGCS Connector addon has to be in that second folder, in our example:
GameName\Binaries\Win64. ReShade has to be placed in that folder as well.
Installing the shader
In the folder where you've installed the addon, you'll see a folder reshade-shaders with two folders: Shaders and Textures. Copy from the folder you unpacked the IgcsConnector release to, the file Shaders\IgcsDof.fx and place it in the folder reshade-shaders\Shaders.
Test your installation
When you start your game, you should see the ReShade banner. It will likely tell you to take the tutorial. After you've done that, open the ReShade Gui (By
default press the Home key) and you should see the IgcsDof.fx effect listed in the list on the Home tab of the ReShade gui. You have to make sure it's enabled.
The Addons tab in the ReShade gui should show the IGCS Connector information and controls.
When you see all that, you're set. Let's go!
The IgcsDoF.fx shader in reshade has to be enabled for IGCS Depth of Field to function. Having it disabled will result in no results.
Getting started
Let's setup a shot and see what steps we need to take. We'll use Baldur's Gate III as an example.
Enabling the shader
The Depth of Field effect uses a worker shader, IgcsDOF.fx to blend the images. It's essential you enable it in Reshade. By default it doesn't do anything
so it's not ruining your images when you're playing. It's best to place it all the way at the bottom so it's executed last.
You can have other effects enabled for your shot. However keep in mind that the camera will move during the render session, which means that effects that require that the camera is stationary won't work. E.g. if you use Marty's RTGI shader, you need to uncheck the 'Render a still frame' option.
Setting up the shot.
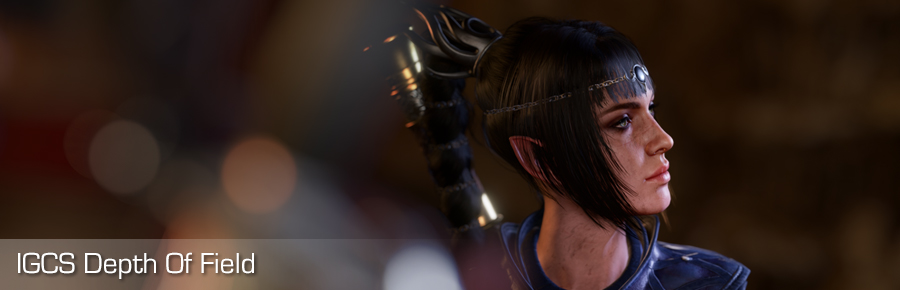
The shot begins by setting up the camera so the subject is properly in view the way we want it. This is done using the Otis_Inf camera tools. You enable the camera, move the camera to the spot you want it to be, optionally pausing the game.
Here's my character looking into the camera with some reshade effects enabled:

Setting up the camera
Now that we've setup the camera for the shot, it's time to setup the Depth of Field
Focusing
Open the ReShade overlay and go to the Addons tab. Open the 'IGCS Connector' area by using the triangle button and you'll see among other things a button saying Start depth-of-field session. By clicking it we'll start a new session. During the session you can't move the camera. You can cancel at any time and restart over with the values you had.
After clicking the button, we're greeted with the following view.
NOTE: The shots below were made with IGCS Connector v2.2. Newer versions have more features and your UI might look a bit different, but the core features are the same.

Starting with focusing
This looks all garbled and off. But it's ok. Let's have a closer look at the focusing values and what they do:
The different areas
The GUI has a couple of different elements and areas
- Max bokeh size. This is the maximum size the bokeh will have. This number is the maximum step size the camera will take in the coordinate system of the 3D game world. In this example, the default of 0.250 is way too big as you can see. We'll bring it down in the next step.
- Focus delta X. This is the tool for you to tell the system which areas should be in focus. How this works is straight forward and will be explained in the next section
- Magnifier. To help with the focus deltas (more on that below), you can enable a magnifier which is an area that will magnify the pixels on screen below that area. You can extend its size and location and also the magnification.
- Bokeh setup. Here you can define which type of bokeh you want (Circular or Aperture shape) and the specifics per bokeh type. The different settings will be described below in the bokeh setup section.
- Start render and Cancel. The buttons to kick off the rendering once you've setup everything properly. By default the progress bar is displayed in the top left corner of your screen. If you want to see the progress bar right in the ReShade overlay, uncheck the 'Show progress bar as overlay', it'll then be displayed in the ReShade overlay.
Setting up the max. bokeh size
As the example shot above shows we have a maximum bokeh size that's more than half the screen so that's way too big. We'll bring it down considerably so it looks something like the following. Keep in mind it's not meant to move the two shots correctly on top of each other with this value. It's meant to specify the bokeh size. So for the test shot I've brought it down considerably:

Specifying the max. bokeh size
The max bokeh size we'll potentially see in the shot is the length of the red arrow in the image (Added for illustrational purposes). This maximum size is likely seen far away though. You can change it after setting the focus, it won't change the focus value once you've set it.
Setting up what's in focus
Now we're ready to specify what has to be in focus. For this shot we'll be focusing on the eyes, so these have to be in focus and sharp. All the rest of the shot might become less or more blurry. To do that we'll change the value for Focus delta X so the eyes in both images are on top of each other and sharp. To do this, just drag the value left or right to change its value.
By changing the value it'll now look something like this:

Specifying focus deltas
It might be it's not immediately visible if you've aligned the image properly. To help you with that you can open the magnifier. Click the 'Show magnifier' checkbox and change the magnifier area size and location so it magnifies the eyes. This will look something like this:

Specifying focus deltas using the magnifier
It showed the values for focus deltas were almost correct. After making sure things were properly sharp now, we can move on to setting up the bokeh shape. (Yes I also have to chuckle when I see the magnified results at times)
Setting up the bokeh shape
By default the quality is set to a low value. It's the number of rings in the bokeh shape. Increasing the quality means it'll increase the number of rings and thus the number of temporary shots the system will take. The more shots, the slower it'll be.
To get proper bokeh highlights in our blurred background, we need to increase the quality a bit. The shape you see rendered with the dots shows which pattern the camera will follow. Less rings/points means larger gaps between the positions, which can potentially lead to gaps in the highlights.
Increase the number of points in the innermost ring a bit to e.g. 7 and then increase the number of rings to, say 20. You'll now see a nice set of rings with dots in the Blur shape area. In the example here, it'll lead to 1470 shots, which is quite a lot so it'll take a while. If you're not sure you've setup everything correctly it's usually a good idea to use a low number of rings first and see how it'll look. Especially for highlight boosts it's good to test them out.

Setting up the bokeh shape
What quality setting to choose?
It might be tempting to crank up the quality to a very high number, but chances are you don't need it. Experiment a bit which quality setting / which number of points setting gives bokeh's that look smooth and don't have dark spots.
Here's a comparison on imgsli which compares a 1600x1600 shot using three quality settings: 5, 10 and 20. As you can see with 10 it's already almost perfectly smooth. In a higher resolution you might need a higher quality setting however. Once you've determined what a good quality setting is for a given resolution and max bokeh size, you can re-use that number in future shots in that game.
Advanced settings
IGCS Depth of Field offers more settings, these are briefly described below. All settings have a direct effect on the shape preview so you can set it up in real time before rendering. At the end of this page you'll find several examples of spherical aberration and fringe settings to help you decide what to choose.
- Frame wait type
- This is either Fast or Classic. Default is Fast. 'Fast' is a system which can render at full framerate, 'Classic' is slower and is mainly used as a fallback for the situations when 'Fast' leads to blurry images. It's recommended to start with 'Fast' and only use 'Classic' if you can't find framewait values for 'Fast' that lead to sharp in-focus areas in your image.
- Number of frames in flight (Fast only)
- Use this value to define the number of frames the engine has 'in flight' (so the number of frames it is working on at the same time). This is usually 1 or 2 but for engines with a long render pipeline you might to need to increase this value to a higher value, e.g. 4 or 5. Increasing this value doesn't increase the render time.
- Number of frames to wait (Fast)
- Use this value to define a delay before the frame is blended. For full frame rate rendering, set this to 0. Setting this to 1 halves the framerate, setting it to 2 makes the rendering speed become 1/3rd of full framerate etc. Setting this value to 1 will make IGCSDOF wait for 1 frame before it'll blend the rendered result which can lead to sharper in-focus areas if the game has some ghosting or e.g. blurry TAA. Some games need 1-2 frames to settle after camera movement, to get rid of e.g. TAA ghosting. If that's the case, this value can help fix that. Do realize that if you set this value higher than 'Number of frames in flight', you effectively are using 'Classic'.
To get started with setting up 'Fast', it's best to do the following. Set 'Number of frames to wait per frame' to 0 and 'Number of frames in flight' to 1 and start a rendering. If you get a blurry in-focus area right from the start, click Cancel to stop the rendering and increase 'Number of frames in flight' to a higher number, e.g. 2 or 3 and try again, till you get a non-blurry in-focus area. You can then fine-tune sharpness if needed, with increasing 'Number of frames to wait per frame' to a higher value, like 1 or 2. However in most cases, leaving 'Number of frames to wait per frame' to 0 is sufficient.
- Number of frames to wait (Classic)
- Use this value to specify a delay during blending a frame. Usually 1 or higher but if the engine uses a lot of temporal effects you might need to increase this value. Increasing this value will increase the render time.
- Ring angle offset
- This is the offset each ring is rotated related to the ring just around it. This can help mitigate patterns in the bokeh shape so you won't see rows of 'bright dots'.
- Anamorphic factor
- This is the factor to mimic anamorphic lenses, which result in vertical ellipse bokehs instead of circles.
- Spherical aberration dim factor
- A factor to help you control the amount in which the inner rings are dimmed in highlights. This leads to an effect called 'spherical aberration'
- Fringe intensity
- A factor to specify the bokeh outline intensity. How big this outline is is controlled with Fringe width. The higher the value the more darker the inner pixels of the highlight will be, causing the edge of the highlight to stand out. If you set this factor to 1.0 or a value close to 1.0, the screen will go black at the start of a render if you're rendering from inner to outer ring, and this is ok, as all light is going to be at the edge of the highlights.
- Fringe width
- A factor to specify how wide the outline of a bokeh highlight is. This value works together with the Fringe intensity.
- Chromatic aberration type
- The selector for the chromatic aberration type you want to have on the edges of the bokeh highlights. The colors you select will appear on the edges of the highlights. If you select a chromatic aberration type with just two colors the rest of the highlight will be compensated for having one less color in the edges. The higher the chromatic aberration width, the more prominent this will be.
- Chromatic aberration strength
- A factor to specify the strength of the chromatic aberration in the bokeh highlight edges. A value of 0.0 switches off chromatic aberration.
- Chromatic aberration width
- A factor to define the width of the chromatic aberration area in the edges of the bokeh highlight. The higher the value the thicker the edge with chromatic aberration.
- Cateye bokeh intensity
- The intensity of the cat-eye effect in the bokeh. Negative values cut the bokeh shapes from the inside, positive values cut the bokeh shapes from the outside. A value of zero means no cateye bokeh.
- Cateye bokeh radius start
- The distance from the center of the screen where the cateye bokeh effect has to start. This value has to be smaller than the Cateye bokeh radius end value. If Cateye bokeh intensity is zero, this setting has no effect.
- Cateye bokeh radius end
- The distance from the center of the screen where the cateye bokeh effect has to end. This value has to be bigger than the Cateye bokeh radius end value. If Cateye bokeh intensity is zero, this setting has no effect.
- Add a vignette darkening to the cateye bokeh
- If checked, a vignette is applied to the cateye bokeh effect. If Cateye bokeh intensity is zero, this setting has no effect.
- Render order
- This is the order in which the different steps are rendered. It could lead to interesting results during the rendering process, which you can capture when you pause the rendering. The 'Random' option will potentially lead to a slightly undersampled end result.
- Highlight boost factor and Highlight gamma factor
- These two values control the boosting of highlights in the end result. Gamma should usually be at 2.2 but in dark shots it might be necessary to crank this up to a higher value.
Aperture shaped bokeh
Besides circular bokeh, IGCS Depth of Field also allows you to create bokeh shapes with corners, like squares, triangles, hexagons etc. Below is an example of a pentagon shaped bokeh, with some spherical aberration setup as well. The max bokeh size is increased a bit to visualize the effect in the end result.

Setting up the aperture bokeh shape
- Number of vertices
- This is the number of corners your shape will have.
- Rounding factor
- This is the factor how much roundness your shape will have. The higher the more it'll look like a circle
- Rotation angle
- The angle over which the shape is rotated.
The shot the setup of the example shot above will result in is displayed at the end of the guide.
Ready to render
We're all set to render our shot now. This might take some time, probably over a minute depending on the framerate. IGCS Depth of Field won't take the screenshot for you, that's up to you when the rendering is done.
To start rendering click the Start render button. It'll display a progress bar in the top left corner. If you take screenshots with Reshade (which is recommended) it won't show up in the screenshot.
Done, first take the shot!
After the shot has been rendered, the addon will show you it's finished and you can take the screenshot now. Press PrintScreen to let reshade take the screenshot.

All done, ready to take the shot
And the final result with our circular bokeh setup:

The end result
Final result with our aperture bokeh setup:

The end result, using aperture bokeh
End the session
After you're done, you have to end the session. To do that, click the End session button. This will end the session and also remove your rendering result. So be sure you've taken the shot before clicking this button!
Tips and tricks
- Disable TAA / Anti Aliasing for sharper results. Although IGCS DoF will result in sharp, in-focus areas, they will slightly soften due to the used technique. To avoid that you could disable the anti-aliasing method used in the game. Due to the blending of various images, the end result will look anti-aliased and a bit sharper than when you'd have anti-aliasing enabled.
- Increase 'Number of frames to wait' if everything looks blurry. Some games, like Cyberpunk 2077, have several frames 'in-flight' which means changing the camera to move to
the left on frame 1 might result in a changed point of view on screen on frame 4. As IGCS DoF moves the camera around, it has to be sure the image on screen is the image resulting
from the camera move. Usually this is 1 frame later (hence the default value of
1for this setting), however if the game has several frames in-flight it might take a bit longer. Try to experiment with increasing this value till the frame is as it should. Try this with a low quality setting as you can see it quite quickly if things aren't ok. - Use a low quality setting plus 'Random order' to test the bokeh size/highlights. The default values for highlight boost and gamma are likely the ones you want to use but if you want to change the brightness of highlights, it might be a bit of a gamble. To test if the setting you have set these values to is the right one, try a test run on a lower resolution with a low quality (like 5 or 6) so you get results quickly. Also use 'Random' or 'Outer to inner circle' for the render order to determine if the max bokeh size you've selected is large enough (or too large) for the shot you're trying to create.
Typical values for Frame wait type and Number of frames to wait
Below is a short list of popular games and engines which might help you get started with which values to choose. It doesn't matter if you choose Fast or Classic for the Frame wait type, the number of frames to wait is the same (you can use higher numbers for Number of frames to wait when you choose Classic, but it will only make the render slower)
| Game / Engine | Number of frames to wait |
|---|---|
| Baldur's Gate 3 | 1 |
| Cyberpunk 2077 | 4 |
| Unreal Engine 4 games | 2 |
| Unreal Engine 5 games | 4 |
That's all there is to it
And that's all you have to do to get perfect, real-life depth of field in your screenshots. Now go out there and amaze the world with your shots!
Fringe and spherical aberration examples

Normal highlights, no fringe, no spherical aberration

Fringe edge set to 2 rings, Fringe strength set to 0.5

Fringe edge set to 2 rings, Fringe strength set to 0.75

Fringe edge set to 2 rings, Fringe strength set to 1.0

Spherical aberration dim factor set to 0.5

Spherical aberration dim factor set to 1.0